
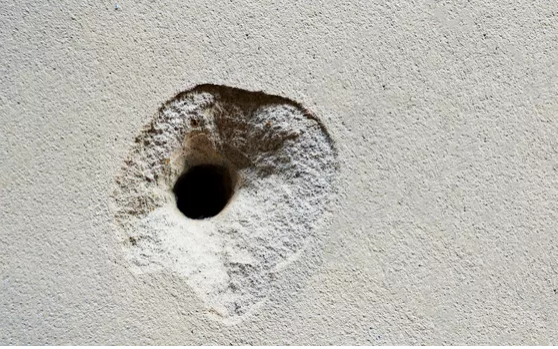
During interior renovation work, it is sometimes unavoidable to touch up the walls. However, the presence of holes makes them not only difficult to maintain but above all unsightly.
Before defining the best wall decoration ideas, it is urgent to fill them. Otherwise, you cannot start painting or apply a new covering.
Small or large holes, sealing them is not complicated. You just need to master a few techniques and have the right equipment, and you’re good to go. To learn more on the subject, we invite you to read this article. Here is the essential to remember.
📋 **What to remember:** Personally, I consider that repairing an impact is within everyone’s reach, knowing that 90% of defects disappear with a simple well-smoothed layer of filler. My opinion is that it is better to favor a light filling compound that does not shrink when drying. For a professional result, don’t forget to sand with a fine 180 grit after 2 hours of application.
What tools are necessary to fill a hole in a wall?
The filling work depends notably on the nature of the surface. To repair a hole in a plasterboard wall, the products used are not necessarily the same as those for a wall made of gypsum, plasterboard or bricks.
So be sure to inquire about the equipment to acquire at a tool and DIY store in your area.
As a general rule, filling compound is suitable for almost all types of walls. It is recommended as a precaution to choose a ready-to-use product to fill small holes. For larger ones, prefer powdered filler.
| Type of hole | Recommended filler | Drying time |
|---|---|---|
| Anchor / Nail | Light filling | 30 min |
| Wide crack | Powdered filler | 4 hours |
| Deep hole (>2cm) | Adhesive mortar | 12 hours |
| Wall finishing | Smoothing filler | 2 hours |
To apply it on the surface, you need a putty knife. Often made of stainless steel, it is easy to handle. Especially since it has an ergonomic handle, the tool is pleasant to use.
For smoothing filler, it is used to prepare slightly damaged walls. Many use it on heterogeneous non-porous materials. You can also use it before painting to hide small imperfections such as scratches.
Besides that, a cutter can be handy when removing holes on the wall. The same goes for sandpaper. It allows you to lightly sand the surface. After scraping, a few passes with a brush or a handheld vacuum cleaner are necessary.
The tools used depend notably on the size and nature of the holes to be closed. To fix a large hole in a plasterboard wall, you need, in addition to what we mentioned above, a piece of plasterboard, metal shears, a saw blade, and many others.
💬 **Personal anecdote:** During my last move in 2025, I had to fill about twenty anchor holes in one afternoon. I used a tube of “ready-to-use” filler to save time, but the lesson learned is that you should always moisten the bottom of the hole first. Without that, the plaster absorbs the water from the filler and the repair ends up cracking the very next day.
What are the most common types of holes in a wall and how to fill them?
Holes caused by plastic anchors and nails are among the very common repairs. To seal them, start by driving a screw into the anchor. Once done, remove the whole thing from the wall with pliers.
Then clean the edges using a utility knife to widen the entrance, then sand. Now apply filler to the hole using a knife. If necessary, remove the excess filler. Let the product dry before sanding.
Holes left by door handles are also among the common problems to solve. To do this, first get rid of the excess plaster. Use fast-setting cement to cover the area.
After application, clean off the cement residue with a trowel. To speed up drying, why not set up a fan in the room.
As for large holes, many situations can cause them. In any case, repairing them is not a difficult task at all.
To achieve this, first make sure to remove crumbly parts by brushing the wall. Then sand it to help the filler adhere.
Once the surface is ready, apply filler to the hole. Then let it dry for a day and sand until the surface is smooth.
It is preferable to apply smoothing compound with a knife. Then let it dry for at least 12 hours. The final step is sanding with very fine sandpaper.
🌍 **Did you know?**
A well-prepared wall with quality filler can reduce paint consumption by 20% on the repaired area, because the surface becomes less porous.
How to prepare the wall before filling a hole?
If you want better finishes, it is essential to properly prepare the wall. This step is often underestimated by some people. However, it helps improve the quality of the work.
First of all, use a tarp to protect furniture or the floor near the surface to be treated. Inspect the condition of the area. To measure the size of the hole, use an HB pencil and a carpenter’s square.
That said, clean the wall. Even if you are filling the hole, the surface must always be clean. This allows the filler to adhere well.
If you notice moisture problems, you must fix them first. Otherwise, your patching solution won’t last long.
The part of the wall near the hole must be not only clean but also smooth. It is necessary to remove any cement or wallpaper residues that prevent the filler from adhering.
It is better to remove a little more material around the hole to work on a healthy and solid surface. To do this, sand the wall with sandpaper. Remove dust traces using a brush, a paintbrush, or even a vacuum cleaner.
⚠️ **Common Mistake**
The most common mistake is wanting to paint directly after smoothing the filler. If the filler is not perfectly dry through and through, the paint will blister or change color due to residual moisture.
What type of filling material should you choose to fill a hole in a wall?
The material to use can vary depending on the size of the hole. In any case, filling compound is suitable for almost all surfaces. It comes in several versions.
For a small hole or dent, it is recommended to opt for a pot model. This comes in many different sizes, such as 700 g or 1.5 kg.
For dowel holes, you can close them with a multi-purpose tube filler. If you plan to fill a large hole, a powder filler is necessary. To use it, you must first mix it.
To seal a crack, a filling compound is always useful. Alternatively, you can use mastic-resin cartridges.
💡 **Tip**
Always use two filling knives: a wide one to apply and a narrow one to load the filler. This helps keep your finishing blade clean and prevents scratches on the wall.
Choose those intended for the wall material, for example stone, concrete, or plaster. It is also possible to use an acrylic mastic-resin. This is perfect if you plan to paint the surface afterward.
How to apply the filling material into the hole to obtain a smooth and even surface?
🍀 Pros
- Very low cost
- Invisible result
- Quick drying
🔻 Cons
- Sanding dust
- Paint touch-ups
- Skill required
If you are well equipped, it is quite possible to obtain a regular and smooth surface. The success of the application also depends on surface preparation. The wall must have no holes or roughness.
Whether you use a ready-to-use filling compound, in paste or powder form, it is recommended to apply it very deeply into the hole using a trowel. You should make sure to score the surface.
Once the product is taken, make sure to smooth the surface well with a putty knife. Respect the drying time which is generally indicated on the packaging.
When the wall is not perfectly flat, it is imperative to add filler. When applying a finishing coat, the filler must be smoothed well to achieve excellent results.
How long should you wait for the filling material to dry before sanding and painting?
The drying time of the filler varies depending on certain factors, particularly the type of product. Indeed, your choice of filling compound depends on the size of the holes.
If these are large, closing them requires the use of powdered filling compound. It is necessary for the paste to be very smooth. This way, its application is faster and it will dry in record time.
For a preparation that is too wet, it takes longer to dry and harden. To avoid this, it is recommended to refer to the instructions mentioned on the packaging.
To make your life easier, nothing is simpler than using a ready-to-use filler. In any case, this material generally has a drying time of about 5 hours.
How to sand the filling material to obtain a perfectly smooth surface?
Sanding a filling compound does not require any specific equipment. You need to know how to apply the right techniques.
Respecting the drying time plays a crucial role. You must let the product dry completely. If possible, a whole day may be enough. Once the filler is dry, you can sand it thoroughly to flatten the wall.
To do this properly, use ultra-fine sandpaper. Otherwise, a sander can be useful.
How to choose the right paint to paint over the filling material?
There are different parameters to consider to define the right paint. It is advisand to favor a branded product. There are many options, for example glossy paint, acrylic paint, or insulating paint.
Before application, check that the filled wall has no unevenness. Otherwise, the paint may highlight small imperfections.
How to prevent the filled hole from reappearing after painting the wall?
To achieve this, it is more than important to use a high-quality filling compound. Also, do not take the preliminary phase lightly. The wall must be perfectly prepared before application for better adhesion of the product.
It is also essential to properly follow all the steps including preparation, sanding before filling, applying the filler, drying time, finishing coat, and final sanding.
If new holes reappear despite puttying or sealing, the solution is to do a paint touch-up. You work only on the affected area and make sure it is not visible from the outside.
Estimate the quantity d’plaster de rebouchage to plan pour your travaux.
ml
 How to make a work estimate?
 How to modernize a staircase?
 Free wooden pallets
 What is the best exterior insulation?
