When planning to do the plumbing yourself, the choice often comes down to concealed piping or exposed piping. The first option is very aesthetic, but its installation is by no means an easy task.
On the other hand, the second can be installed without difficulty. It seems simpler and faster to make a plumbing connection.
However, it must be admitted that exposed pipes sometimes do not look very pleasant. It is possible to hide them or even highlight them. Before getting to the heart of the matter, it is appropriate to mention the advantages of leaving pipes visible on the outside.
📋 Key takeaway: Personally, I consider exposed plumbing to be one of the easiest design challenges to solve, as over 80% of unsightly pipes can be hidden using simple DIY methods. Boxing them in or using decorative covers provides a clean finish without permanent structural changes. In my view, matching the concealment method to your room moisture level saves both time and budget. Taking precise measurements before buying materials guarantees a seamless result on your first attempt.
What are the reasons why pipes are often left exposed?
🗣️ My experience: During a bathroom renovation in March 2024, I tried to cover a vertical copper pipe using cheap adhesive tape that cost me $15. Within two weeks, condensation caused the tape to peel off completely. I replaced it with a custom removable wooden box column, which solved the aesthetic issue permanently. The key lesson here is to always account for moisture and pipe temperature before choosing your covering material.
Besides its ease of installation, exposed piping makes any intervention easier. In case of a leak, the cost of plumbing repair becomes cheaper.
The professional is not obliged to dismantle the entire structure. Detaching a few fittings or pipes may be enough to solve the problem.
Moreover, this installation is not necessarily a disadvantage. It does not always need to be hidden.
When pipes are located high up, they are unlikely to bother you during the installation of your furniture. In this case, there is no problem with leaving them exposed.
If you like the industrial style, copper or aluminum pipes add charm to your interior decor. Their raw appearance gives an industrial touch to the room.
Before starting your boxing project, checking for potential plumbing issues is essential. If you notice leaks or pressure drops, learning how to find a clog in a pipe will save you from sealing over a major issue. For wall repair steps around the installation area, you can easily fill hole in wall before mounting any support frames. Furthermore, adding decorative storage above your pipe box is simple if you create custom shelf optimize space effectively.
In some cases, the piping also becomes a unique decorative element. You can take advantage of this to enhance the home.
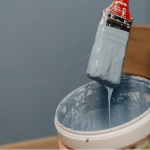
The least expensive but most effective solution is to paint it. With a good choice of color, it can blend into the overall decor.
| Concealment method | Average cost ($) | Installation time | Difficulty level | Removability |
|---|---|---|---|---|
| Pipe boxing (MDF or plywood) | 25 – 60 | 2 – 3 hours | Intermediate | High |
| Snap-on plastic covers | 10 – 25 | 30 mins | Beginner | Very high |
| Decorative painting | 15 – 30 | 1 hour | Beginner | None |
| Custom shelving unit | 45 – 120 | 3 – 4 hours | Intermediate | High |
| Greenery and ropes wrap | 12 – 35 | 45 mins | Beginner | High |
How to choose the best method to hide an exposed pipe depending on its position and diameter?
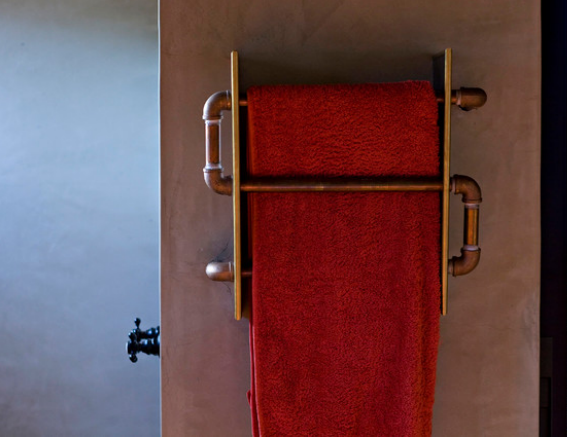
If these plumbing elements are in the bathroom, you can hide them by transforming them into an original towel rack. With some creativity, they can hold your towels perfectly.
Otherwise, you can turn them into an asset by creating a minimalist style sink. To do this, simply build a nice basin around these pipes. By painting them metallic gray, they highlight the basin and make it modern, enhancing the bathroom.
If they come out of a wall in a living room, consider using them to build a bookshelf. The furniture can be assembled around these pipes.
You can also use them to reinforce your shelves. The pipes become a sturdy support to hold them, allowing for an unusual finish.
🌍 Did you know? Uninsulated exposed hot water pipes lose up to 15% of heat energy before reaching your faucet, which can increase household heating costs noticeably over a year.
For those with overflowing imagination, they can even exploit exposed pipes at ceiling level. The goal here is to build an original roof.
Taking advantage of their robustness, they serve in this case to support, for example, an awning or a lean-to. In their raw state, they create a simple but extremely sleek structure.
⚠️ Classic trap: Sealing a pipe enclosure with permanent glue or nails without leaving an inspection hatch is a major error. When a leak occurs, you will be forced to break the entire wall structure to access the pipe.
What are the most commonly used materials to hide exposed pipes?
There are several materials that can be used to conceal visible pipes. Custom boxing is one of them and it is among the most commonly applied solutions by both professionals and individuals.
Easy to make, it serves to fully cover the ducts. To build it, you have a choice among countless materials such as wood, plaster tiles, water-resistant plasterboards, plywood and many others.
The simplest method is to use panel strips. You just need to fix them together. You can then hold them in place using battens.
For a horizontal boxing, use a single batten. However, two supports are essential for vertical boxing.
To make this material perfectly invisible, consider painting it or covering it with paneling, wallpaper or plaster.
Besides custom boxing, using ducts and cornices is also possible to camouflage pipes. Easy to install, they can be disassembled very easily and quickly if needed.
Plastic materials are generally available on the market. But when pipes are installed at height, it is better to use PVC models.
In any case, cornices and ducts are not only easy to maintain but also very aesthetic.
💡 Practical tip: Always leave a gap of at least 15 mm between the pipe surface and your enclosure board to allow for air circulation and natural thermal expansion.
How to measure the length and diameter of the pipe to ensure the chosen material is large enough to cover it?
To avoid mistakes, it is essential to take exact measurements of the pipe. More precisely, knowing its diameter and length may be necessary.
Once you have the correct values, you can then look for suitable materials to cover it entirely.
In general, determining its size does not require any particular technical skill. However, the diameter can be a bit difficult to gauge.
To start, you need to define whether you want to know the inner or outer diameter of the duct. If the pipe is measured by the inner diameter, the tube is estimated by the outer diameter. Once this is done, you can measure the element using a tape measure or a ruler.
The easiest technique is to use a string. This helps you find the circumference by wrapping it around the pipe. Thanks to this measurement, it becomes easier to know its dimensions.
How to cut the pipe covering material to the right size?
Among metal, plasterboard, wood, and plastic, the latter is the most used to hide plumbing. To cut it effectively, the cutter and scissors are among the most practical manual tools.
Besides that, you can find on the market a special device called a pipe cutter pliers.
As its name clearly suggests, it is made to cut pipes, especially those made of PVC.
Many plumbers also use the hacksaw. With the fine teeth of its blade, it allows for precise cutting.
The same goes for the PVC saw. This one will not disappoint you when cutting a pipe covering material. For the jigsaw, the tool is reserved for rigid PVC pipes.
How to securely fix the pipe covering material and ensure it does not fall?
So that the state of the plumbing does not cause you problems, remember to firmly fix the pipe covering material.
If you use ducts, they can be firmly attached to the wall using a glue sealant, for example. If necessary, do not hesitate to drill the wall to place anchors and screw the profile. To proceed with their installation, you need a tape measure, a carpenter’s square, a spirit level, and a miter saw.
If you choose a custom casing, you must first pre-drill the battens. To ensure their fixation, use nails, anchors, and screws. A hammer drill is necessary to help you drill the wall more quickly.
🍀 Key benefits
Improves room aesthetics instantly.
Protects pipes from accidental physical impact.
Reduces plumbing noise in living spaces.
🔻 Main limitations
Requires precise measuring and cutting.
May slightly reduce usable floor space.
How to hide exposed pipes in tight spaces such as room corners?
If you do not like leaving the plumbing exposed, you can conceal it with cornices or ducts. If space constraints do not allow this, consider turning it into a decorative element.
When it is located in the bedroom or an entrance, feel free to turn it into a coat rack. With small hooks, you can hang your jackets or coats on the pipes.
The plumbing might also remain quite visible up high; consider taking advantage of it. It can serve as a support for your bulbs or lights.
When the pipe of a radiator is installed under your window, use it to hold the curtains. Choose fabrics that seem harmonious with the room’s decor.
How to hide exposed pipes in outdoor spaces such as terraces and gardens?
The problems of exposed pipes do not only appear inside the house. They can also be faced outdoors.
Often, plastic tubes are used to irrigate the soil. To hide them, why not simply create pathways, for example, in a vegetable garden? You can use them as separators between plants.
For those who have a large plot, garden hoses are generally very long. As a result, they can tangle more easily.
To store them efficiently, it is advisable to hang a nice wrought iron holder, for example. Then wrap the hoses around it. Thanks to this trick, they become beautiful to look at. They add an aesthetic touch to the outdoor space.