Summary: Planing a board involves removing a thin layer of wood to obtain a smooth, uniform, and perfectly flat surface. This operation is carried out using a manual or electric plane following the direction of the wood grain to avoid splinters. With the right settings, a few progressive passes, and careful finishing, planing allows you to adjust the thickness of a piece or improve its appearance before assembly.
Planing is a very common woodworking task in carpentry workshops. Many people use the electric planer to correct the thickness of their door warped by humidity.
Some use it to renovate their furniture. This tool is very useful for making a storage cupboard.
Apart from the electric model, there is also the hand plane, bench plane, angle plane, and professional plane. They are designed for specific woodworking projects. They are used to plane boards of all sizes.
🎒 On the field: During my first planing session in the workshop, I bought a plane for 25 euros without checking the blade adjustment. Result: irregular shavings and a damaged board in less than 10 minutes. Since then, I always take 2 minutes to precisely adjust the tool. The lesson is simple: a good adjustment is better than an expensive tool.
If you want to know how to plane wood, we invite you to discover this article summarizing the important points to consider on the subject.
How to plane with a sander?
| Tool | Use | Level | Advantages |
|---|---|---|---|
| Manual plane | Precise finishes | Advanced | Total control, quiet |
| Electric planer | Fast material removal | Beginner to expert | Time-saving, consistent |
| Wood rasp | Small touch-ups | Beginner | Simple and economical |
| Sander | Smooth finish | All levels | Perfect for the final pass |
During woodworking tasks, a smooth surface on a wood piece is often needed. Generally, a planer is used to achieve this finish. As its name suggests, it is the perfect tool for planing wood boards.
However, if the work becomes repetitive, it will waste your time and tire you very quickly. To avoid this situation, woodworking professionals do not hesitate to use the belt sander.
Although it is not intended for planing, it can still be used. Thanks to an integrated series of sandpaper, you can joint plane boards to obtain a homogeneous finish.
In two steps, you use fine-grain sandpaper and then coarse-grain sandpaper separately. At each pass, try to plane the entire length of the wood piece, avoiding working on a particular surface.
Using the sander generally produces a lot of dust. It is recommended to equip yourself with a dust mask and special goggles to protect your health.
🌍 Did you know?
A well-adjusted plane can produce wood shavings less than 0.1 mm thick, almost translucent, a sign of optimal precision work.
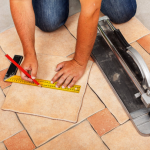
Planing a wooden board
🌟 The advantages
- Perfectly smooth surface
- Precise and clean work
- Professional finish
🔍 Drawbacks
- Requires technique
- Necessary adjustment time
If you are wondering how to plane a wooden board, there are many machines to help you achieve this.
Many carpenters still use hand planes. They come in several models varying by size. But nothing is more practical than an electric planer. Versatile, it offers good results for jointing and planing boards in record time.
To use it, you must first adjust the depth and then turn it on. Make sure the wooden piece is securely clamped in the vise. Once done, press the handle of your planer firmly. This creates the right pressure on the board.
When the electric planer removes excess material from the surface, check the result. To do this, touch the planed part with your hand. If it is smooth and even, it no longer needs to be corrected. Otherwise, consider planing it again.

How to plane a table?
Many appreciate the practicality of an electric planer to joint boards or plane furniture. In most cases, people plan to plane a table because it has irregularities due to design flaws or the test of time.
It should be noted that wood is a hygroscopic material. Over time, your table absorbs moisture and this condition eventually deforms it. To restore it to good condition, use your planer and remove the imperfections.
Then run your hand over the surface you just planed. If the results do not satisfy you, redo your woodworking. Once finished, sand the area with sandpaper to make it smoother.
⚠️ Common mistake
Planing against the grain is a common mistake that tears the fibers and damages the surface. Always follow the grain direction for a clean result.
Planing a board by hand
If you do not have a planer or an electric planer, it is still quite possible to plane wood manually.
You have the choice between different tools such as the hand plane, the jack plane, the bench plane and the angle plane.
At 56 cm long, the first tool is used to straighten and rough out wooden boards. The second seems shorter, allowing it to be versatile in squaring small wooden pieces or long boards.
As for the bench plane, it measures around 25 cm. It is the ideal equipment for smoothing and planing boards. The angle plane stands out for its more compact design. Besides planing wooden boards, it handles woodwork on hard-to-reach corners.
Planing a board without a plane
To joint a board, nothing beats using a jointer. The same goes for planing wood. Only an electric plane or a hand plane can provide you with better finishes.
But at some point, you might not have this tool. If you want to know how to plane wood without a planer, consider using a belt sander.
Besides it, the wood rasp allows you to reduce the thickness of a wooden piece by abrasion. It is sometimes used during the finishing of a work board.
When the wooden piece is warped and you plan to repair it, you are not obliged to use a planer. Professionals use an industrial hot air gun. They also use a table circular saw to square boards.
Planing a board wider than the plane
During woodworking, you may face various unforeseen issues. Sometimes the wooden board turns out to be wider than the blades of the planer.
For every problem, there is a concrete solution. You just need to plane by making adjacent passes. To make the task easier, it is advisand to sand the surface to even out the joints.
⏱️ Timing
Work with fine passes of 0.5 mm maximum and check flatness every 2 to 3 minutes to avoid removing too much material.
Planing or sanding: the difference
Planing a wooden board consists of smoothing out saw marks. This operation also allows you to achieve the desired thickness on the surface.
Conversely, the second type of woodworking requires polishing, generally using sandpaper. Sanding is very common during finishing.

To advance in your woodworking projects, also discover how to make a wooden door or how to master smoothing putty for flawless finishes. You can also check out our tips on neatly filling a hole in a wall before completing your project.
How to joint and plane a board?
There are currently many versatile devices that allow you to joint and plane a board at the same time. The electric planer is praised for its multiple functions.
How to plane a board without a plane?
While some people use a wood rasp, others use an industrial hot air gun. The belt sander is also another interesting option.
Why plane a board with a sander?
This tool saves time and limits physical effort. Even though it does not replace the planer, the quality of its work is top-notch.
Why should you follow the grain of the wood when planing?
This prevents splinters and allows for a cleaner surface. Going against the grain causes the fibers to lift and the result becomes uneven.