If you want to professionalize yourself and improve your DIY skills, you need several tools and materials in your workshop. Silicone sealant is one of them and it has many uses.
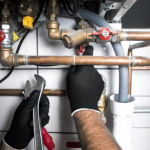
It can be found particularly in the fields of renovation, construction, and sanitary plumbing. Waterproof and flexible, it stands out because of its sticky property.
If you plan to repair a water leak in your bathroom, you can very well use it. It prevents moisture and water from seeping between joints.
There is no need to call a specialist. You can very well do the plumbing yourself with this product. Applying it is child’s play. But to enjoy perfect finishes, remember to smooth it according to the rules of the art.
📋 The essentials at a glance: Personally, I consider that a perfectly executed smoothing guarantees the total waterproofing of your sanitary installations against water infiltrations that destroy plaster partitions. My observation is simple: using a bare finger without a wetting product remains the main cause of an uneven and rough finish. Just use a plastic smoothing spatula or apply soapy water to obtain a regular, waterproof, and invisible bead.
How to properly smooth a silicone joint?
Here are the simple steps to smooth a silicone joint:
Prepare the surface: carefully clean the area (remove dust, grease, old silicone residues).
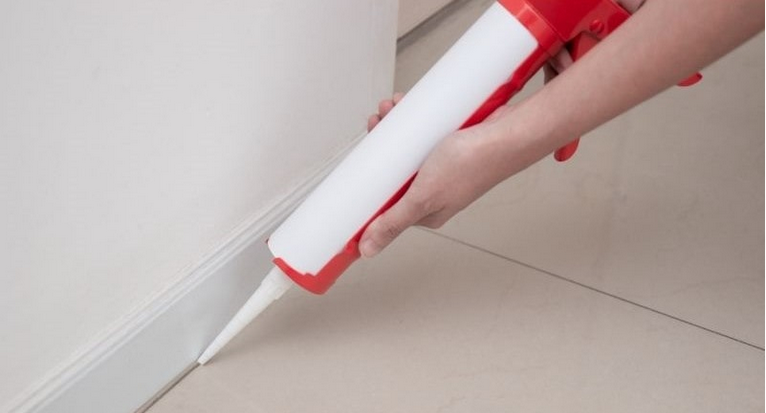
Apply the silicone: cut the cartridge tip at an angle and lay down a regular bead along the area to be sealed.
Moisten the tool or finger: use soapy water (or a special smoothing spray) to prevent the silicone from sticking.
Smooth the joint: run a wet finger or smoothing spatula over it, applying steady pressure to spread the silicone well.
Remove excess: immediately wipe off the surplus with a cloth or absorbent paper.
Let dry: respect the indicated drying time (often 24 hours) before using the surface.
🗣️ My experience: In February 2026, I redid the finishing of a peripheral sealing joint around a white resin shower tray worth 450 euros. The initial installer had spread the sealant directly with a dry finger, leaving very unsightly sticky smudges on the wall tiles. The real lesson I learned from this technical rescue is that the prior application of a simple masking tape on each side of the joint defines a line with surgical sharpness.
More and more people are using siliconeseals to repair a sink, for example. However, it seems difficult to achieve a uniform finish. To get a smooth and pleasant result, it is recommended to use masking tape.
Also known as adhesive tape, this product is used to prevent spreading the sealant all over the surface. It provides a straight line to follow during application.
🌍 Did you know?
The drying process of silicone is not a simple evaporation, but a chemical reaction called polymerization through the moisture in the air, which starts on the surface only 10 minutes after application.
If you plan to use it on your bathtub, first stick a strip of tape on the tub and another on the wall.
Make sure to leave enough space between the two to place a bead of sealant. Try to keep the adhesive tape straight. After smoothing the caulking, you can remove it.
Smoothing a silicone joint should not be rushed. Beginners often make the mistake of doing it all at once. However, you should work in sections if you want to achieve better results.
Thanks to this technique, you will also respect the necessary drying time of one section before proceeding to another.
How to smooth a silicone joint without tools?
When you apply a sealant joint on the wall of a sink, a washbasin or even a bathtub, you must first smooth it before it hardens.
Despite common belief, it is quite possible to do it even without tools. The simplest way is to use your hand.
Although sealant usually tends to stick to your skin, this will not happen because you will use soapy water or dishwashing liquid.
First, wet your finger with the soapy water. Then, run your index finger along the joint. It is important to act quickly, otherwise the excess will overflow from your finger. To wipe it off, use a cloth.
Many DIYers also use a potato to rub the silicone joints. For this, you first need to cut it and try to create a perpendicular angle.
Then smooth the joint with this piece. Since it is rich in starch, it prevents the product from sticking.
Estimateur de matière et technique
Calculate thes besoins techniques selon l’espace entre your faïences et your sanitaires
Méthode d’application requise :
Which product to use to smooth a silicone joint?
Since professionals want to save time, they prefer to use a suitable tool to quickly and efficiently smooth a silicone joint.
Many accessories called smoothing spatulas or joint smoothers designed for this purpose are available on the market. Some are only intended for silicone joints.
Others can be used on various caulking and filling materials. Their common feature is to provide you with a finish that is both smooth and uniform.
It is recommended to choose a model with good ergonomics. It offers you an excellent grip, helping you work comfortably.
Before use, it is best to moisten it well with soapy water. Place a tape on each end of the application area. This helps prevent overflow.
Almost all joint smoothers are easy to handle. After each use, don’t forget to thoroughly wipe off all residues on the tool so you can use it again.
Selected tool
Quality of finish obtained
Ease of handling
Main advantage observed
Silicone smoothing block
Perfect (professional)
Average (constant angle required)
Allows choosing the bevel thickness
Finger with soapy water
Good
Very easy (immediate)
Economical, conforms to concave shapes
Cut potato
Average
Low
Natural starch prevents adhesion
Angled smoother with handle
Very high
Easy
Ideal for narrow access behind faucets
How to remove excess silicone sealant?
The silicone sealant is an ultra-resistant adhesive sealant. It can generally serve as a hermetic seal. Despite its major role, removing it often becomes a long and tedious task.
When you fail to avoid excess during application, it is difficult to get rid of it. To do this, you must start by softening or loosening the silicone sealant.
If the surface is lacquered or painted, you can use ethyl alcohol or ethanol. White spirit is very effective for removing silicone joints. In all cases, always wear gloves for safety.
To remove the silicone, start by scraping the sealant with a cutter. When most of the joint is detached, remove the rest with a razor blade. Others use a damp abrasive sponge.
For mold on silicone joints, a cloth soaked in bleach will do the trick. Otherwise, you can use a detergent free of ammonia.
💡 Practical tip
After smoothing your sealing bead, allow a minimum waiting time of 24 hours before turning on the faucet or spraying water, to allow the core of the joint to polymerize deeply.
Smoothing silicone joint without tools
After moving, it is sometimes inevitable to renovate the bathroom. Creating a silicone joint is a step not to be overlooked to ensure waterproofing. Once done, it is important to smooth it before it hardens.
If you are lucky enough to have a smoother, it makes the task much easier. But if not, you have to find other solutions. Using your hand is one of them and it is widely used by countless DIY enthusiasts.
To start, mix water with dish soap. Then dip your finger into it. Next, slide it over the silicone joint by going over it several times.
Of course, the first few times may seem a bit difficult. But the more you repeat the operation, the more you master it.
When you notice an accumulation or resistance of silicone on your hand, dip it back into the soapy water and the dirt will easily come off.
Smoothing silicone joint with finger
Even though applying the silicone joint does not seem as difficult as it looks, smoothing it is another matter. Achieving a uniform and harmonious finish seems complicated with this material, especially when you do not have the right tool at your disposal.
Fortunately, it is possible to get a good result with the finger. Besides the previously mentioned technique, you can also use soap.
To do this, dip your index finger in a bowl of water and soap. Then rub it on the detergent. Now use your finger directly for smoothing.
Since the sealant can harden when exposed to air, you need to be quick during the operation. When your index finger has passed over the silicone, any scratches may occur. To remove them, use a damp cloth soaked in alcohol. In any case, take the time to read the following section which helps you choose between using a profiled spatula and the manual finger technique:
Perfect thickness regularity along the entire length of the bead
Clean removal of excess material without wall smudges
Possibility to create right angles or beveled chamfers
🔻 Limitations
Requires skill to maintain a constant angle of inclination
Tool is paid and must be carefully cleaned after each use
Smoothing silicone joint on window
Many individuals use silicone joints on door and window frames. This material has many advantages.
Its high resistance to UV rays is one of its major assets. Thanks to this property, windows can keep their new appearance for a very long time.
Moreover, the silicone joint is unlikely to degrade quickly unlike other caulking materials. It also ensures excellent insulation of the joinery.
To apply it, use good tools such as quality silicone sealant, caulking gun, sealant knife and many others.
As for smoothing, use a tool designed for this task. The smoothing spatula helps make the window joint uniform.
It should be noted that this material is not only used on your windows. It can also be used to assemble door frames.
But when you use it in sanitary plumbing, know that in this context you must choose a sanitary silicone. This product is easily found in almost all DIY stores in your city.
Professional silicone joint smoothing
In general, experts hate wasting time. They do not hesitate to work with good equipment to speed up their tasks.
It is the same for smoothing silicone joints. They prefer to use an appropriate smoothing tool to save time. This is usually sold as a kit. It can be reused several times after cleaning.
It is capable of providing professional finishes. Choose a versatile model that is suitable not only for silicone sealants, but also for hybrid polymers, polyurethanes, and many others.
Moreover, using your finger can also be easy to smooth the joints. Regardless of the technique you used, do not forget to remove excess silicone with a soft, lint-free, and especially clean cloth.
10) return ‘Conseil : L’espace est large, utilisez un fond de joint en mousse avant de poser le silicone.’; return ‘Conseil : Width standard, appliquez directement your mastic sanitaire anti-moisissure.’; } }” style=”border:2px solid #4A2D73; border-radius:10px; margin:22px 0; overflow:hidden; font-family:sans-serif;”>
Estimateur de matière et technique
Calculate thes besoins techniques selon l’espace entre your faïences et your sanitaires
u003cbru003eYou just have to dip your index finger in soapy water while applying less pressure. Then slide it over the joint. If needed, go over it several times until everything looks smooth to you.
Why smooth silicone joint?
u003cbru003eThe smoothing step is crucial to obtain nice finishes. Experts recommend doing it within 15 to 20 minutes after applying the material.