Paint bubbling after drying: causes and method for a lasting repair
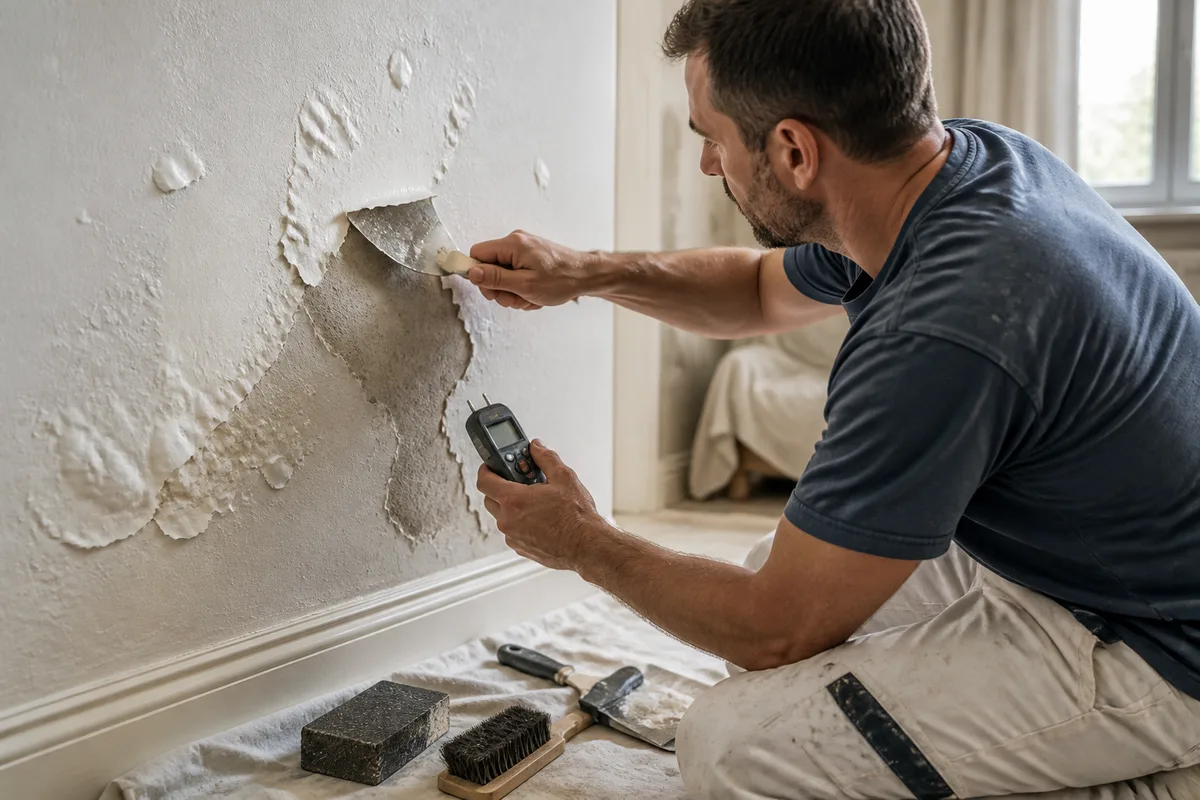
Paint bubbling after drying shows blisters, bubbles, or areas that lift once the film is dry. This defect generally indicates a loss of adhesion between the paint and its substrate, often related to moisture, insufficient preparation, or poor application conditions.
The repair does not consist of quickly covering the bubbles. First, it is necessary to determine if the wall is damp, if the old layers still adhere, and if the products are compatible, then follow a method adapted to the substrate: scraping, drying, sanding, priming, repairing, and new finishing.
In brief
- 💧 Paint bubbling after drying signals a loss of adhesion, often promoted by moisture.
- 🛠️ All unstable parts must be removed before applying filler, primer, or new paint.
- 🌡️ A temperature between 15 and 25 °C is a common guideline, to be adjusted according to the manufacturer’s instructions.
- ⏳ The drying time between coats depends on the product, substrate, temperature, and ventilation.
Why does paint bubble after drying?
The bubble appears when the paint film no longer adheres properly to the underlying surface. A pocket then forms between the coating and the substrate, sometimes immediately, sometimes several days or weeks after the work if moisture or an adhesion defect persists.
A bubble is not just an aesthetic defect: it indicates that an area of the coating or substrate must be examined before any new coat.
The role of moisture in the appearance of bubbles
A still damp wall, infiltration, capillary rise, or condensation can cause the paint film to peel off. In a bathroom, insufficient ventilation and water vapor also increase the risk, especially when the surface remains cold and damp after a shower.
Paint can also bubble on a ceiling located under a bathroom, near a pipe, or around poorly sealed woodwork. In these situations, scraping and repainting without addressing the source only delays the reappearance of the problem.
A poorly prepared or insufficiently clean substrate
Dust, grease, wax residues, chalky old paint, or a surface that is too smooth limit adhesion. The same problem can occur on a wall washed too quickly, on drywall whose cardboard has been soaked, or on wood that still traps moisture.
The substrate to be repainted must be clean, dry, degreased, and sufficiently stable. An appropriate undercoat or primer helps to even out absorption and improve adhesion, but it does not compensate for active infiltration or an old layer that is peeling off.
Unfavorable application conditions
Painting in full sun, on a very hot wall, or in a room that is too cold disrupts the drying of the film. A coat that is too thick can also trap solvents or water beneath its surface, which promotes bubbles and blisters.
Failure to respect the drying time between coats is another common cause. The surface may seem dry to the touch while the layer underneath remains wet; the next application then traps this moisture.
Incompatibility between products
Two layers of different nature or behavior may not work well together, especially when the old finish is poorly identified or too fragile. Before repainting, it is therefore preferable to check the manufacturer’s instructions and perform a test on a small prepared area.
How to identify the cause before repairing?
To diagnose paint bubbling after drying, observe the distribution of bubbles, the solidity of the edges, and the condition of the substrate after scraping. Localized bubbles near a leak are not treated the same way as generalized bubbling that appeared after a second coat.
Observe the location and shape of the blisters
Bubbles spread over the entire surface rather suggest an issue with application, drying, compatibility, or preparation. Conversely, a blistered area under a window, at the bottom of a wall, or around a pipe warrants a check of waterproofing and moisture.
Also distinguish between a blister and a simple finishing defect. Poorly stretched satin paint, roller marks, or differences in gloss do not necessarily correspond to a loss of adhesion.
Check the condition of the substrate
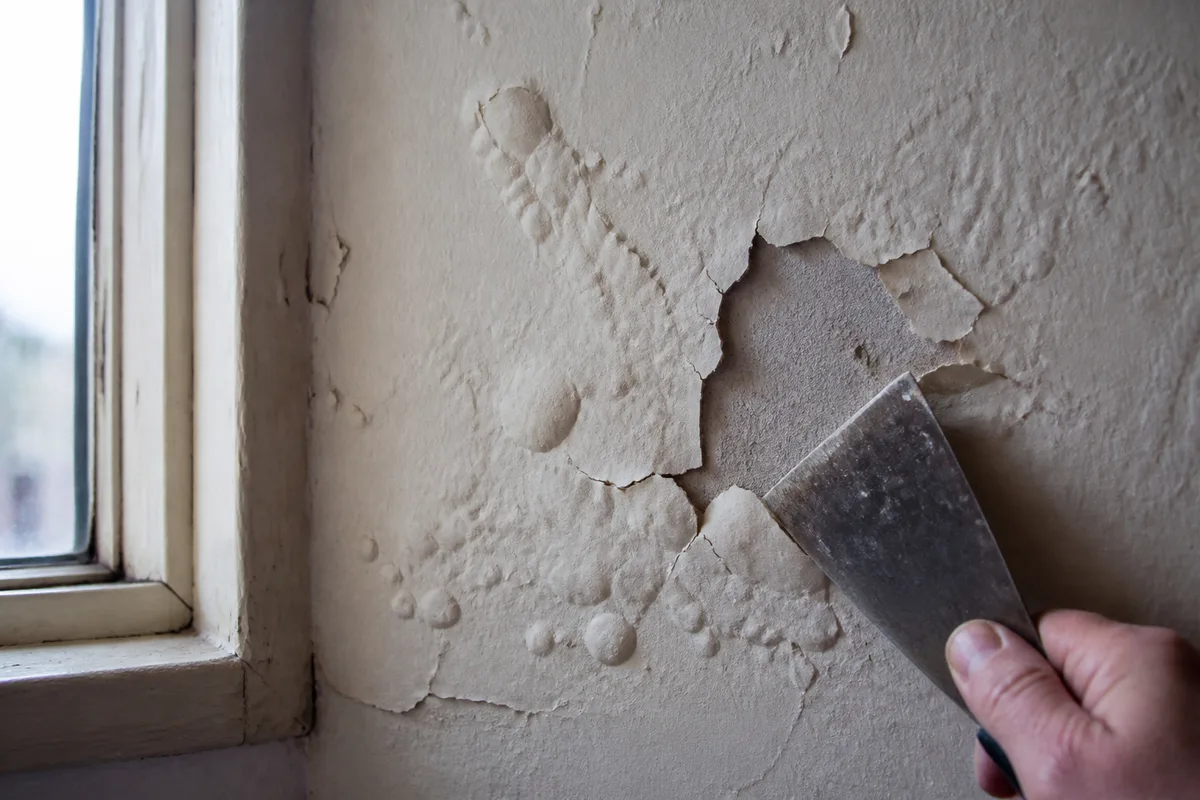
Press gently on the area: paint that sounds hollow, flakes, or lifts easily is not stable. Then open a small blister with a spatula and examine the surface underneath. Powder, crumbly material, a halo, or a feeling of moisture require treating the substrate before considering the finish.
On an old wall, check the joints, corners, window edges, and points near sanitary installations. On a ceiling, look especially for a halo or deformation, which may indicate water damage.
Know when to treat moisture as a priority
If blisters reappear after a humid period, spread, or are accompanied by mold, do not start by repainting. A leak, infiltration, or capillary rise must be located and eliminated; the substrate must then dry sufficiently before any repair.
The proper repair starts with the cause: paint cannot permanently mask a leak, infiltration, or damp substrate.
How to repair blistered paint step by step?
Repairing blistered paint is done on a stabilized surface, never on simply flattened bubbles. The procedure below is mainly suitable for small to medium interior areas; the product used and the finish must always be adapted to the substrate.
Step 1: protect the room and prepare the worksite
Remove nearby furniture, protect the floor, and wear goggles as well as a mask against sanding dust. Prepare a spatula, scraper, sandpaper, brush or vacuum cleaner, a suitable cleaning product, filler if necessary, a primer, and the finishing paint.
Step 2: remove all parts that no longer adhere
Scrape the blisters with a spatula until you reach firm paint. Slightly widen the area if the edges lift, as keeping a thin unstable edge under the new paint often causes new detachment.
Do not force unnecessarily on a plasterboard panel: the cardboard can be damaged. If a large part of the coating detaches, stop to assess the general condition of the substrate rather than multiplying spot repairs.
Step 3: clean, sand, and dust off
Sand the edges to soften the transition between the scraped area and the old finish. On metal, a suitable brush can complement sanding; our guide dedicated to tools for sanding metal details the choice of equipment depending on the surface.
Then clean off dust and dirt, and let dry. A substrate that is still damp, greasy, or powdery will compromise the adhesion of the primer, even if the surface looks visually clean.
Step 4: repair wall irregularities
Fill hollows with a filler compatible with the substrate, in several thin layers if necessary. After complete drying, sand the repair to obtain a flat surface, then dust off again.
If the drywall has been heavily damaged or if the substrate is crumbly, a local repair may not suffice. In this case, seek advice from a professional or the paint system manufacturer before applying an additional product.
Step 5: apply the primer then the paint
Apply a bonding primer or an undercoat suitable for the nature of the surface and the intended finish. Respect the coverage time indicated on the packaging: it varies depending on the product, the thickness applied, the temperature, and the ventilation.
Then apply an even coat of paint, without overloading it, and wait for the drying time before applying the second coat. To limit marks on a healthy wall, also consult these tips for painting a wall without marks.
- Identify and eliminate any possible cause of moisture.
- Scrape off all parts that no longer adhere.
- Sand the edges, clean and let the surface dry.
- Fill in hollows, sand then dust off.
- Apply the appropriate primer and respect its drying time.
- Repaint in even coats, according to the product’s technical data sheet.
Which products and conditions to choose depending on the surface?
The choice of product depends more on the nature and condition of the surface than on the paint’s appearance alone. An interior paint, a wood finish, and a coating for metal do not meet the same adhesion, expansion, and moisture constraints.
| Surface or situation | Point of attention | Recommended repair |
|---|---|---|
| Interior wall | Old flaky layer, grease or moisture | Scraping, cleaning, filler if needed, primer then appropriate finish |
| Ceiling | Leak, stain or weakened surface | Treat the origin before any aesthetic repair |
| Bathroom | Condensation and insufficient ventilation | Dry out, ventilate and use a finish designed for the room |
| Wood | Trapped moisture and material movement | Strip more deeply, sand, let breathe then repaint |
| Metal | Rust, grease or incompatible old finish | Strip, degrease, treat the metal and apply a suitable primer |
Blistering paint on an interior wall
On an interior wall, the most common cause is a local preparation defect or moisture coming from the surface. Check walls facing outside, cold corners and areas near water rooms before only repainting the visible part.
Blistering paint on the ceiling
A blistered ceiling must be examined carefully. A pipe leak, water damage from the upper floor or a roof infiltration can manifest as a stain, swelling or detachment.
Blistering paint in a bathroom
Condensation is often worsened when humid air does not evacuate properly. Check the ventilation system, air out after showers and wait for the surface to be dry before repainting.
If your project involves a complete room transformation, the waterproofing constraints are more important than a simple repainting; they should be considered especially before installing a walk-in shower.
Blistering paint on wood or metal
On wood, unstable layers must be removed and the material allowed to lose its moisture before repainting. On metal, look for corrosion, grease traces and an ill-suited primer; a finish applied over active rust will eventually lift.
Which method to choose: local touch-up, wall repair or complete stripping?
A local touch-up is suitable when blisters are limited, the cause is eliminated and the remaining old paint adheres firmly. A full wall repair is preferable if the repair creates a visible difference in texture or gloss, while a more complete stripping is necessary when several layers are unstable.
| Method | To prioritize if | Limit |
|---|---|---|
| Local touch-up | Few isolated bubbles on a stable base | Risk of appearance difference after drying |
| Wall repair | The repaired area is visible or extensive | Requires more paint and preparation |
| Thorough stripping | Many old layers, crumbly or incompatible | Longer work and sometimes professional |
Repainting immediately over it is rarely a reliable alternative: the new layer follows the movements of the old one and can bubble again. Conversely, removing more paint is not always necessary if the hard base is clearly identified and properly prepared.
What mistakes prevent a lasting repair?
The same defects recur when the repair only addresses the appearance. The following errors are particularly common during a paint repair that bubbles or peels.
- Covering bubbles without opening them: the pocket remains under the new film.
- Painting on a wet surface: the water continues to disrupt adhesion and can cause new blistering.
- Applying a layer that is too thick: drying becomes uneven and moisture can remain trapped.
- Mixing products without checking their compatibility: layers may adhere poorly or shrink.
- Repainting before real drying: a surface dry to the touch is not necessarily ready to receive the next layer.
The drying time indicated on the can is a coverage guideline, not permission to work in any temperature or humidity.
How to prevent paint from bubbling again?
To prevent bubbling, work on a dry and stable surface, in a properly ventilated room and at a temperature compatible with the technical data sheet. The guideline of 15 to 25 °C is often used for application, but wall temperature, ambient humidity, and local conditions also matter.
Avoid painting in direct sunlight, extreme cold, or when the air is very humid. Over the seasons, the same wall can react differently: a poorly ventilated room in winter promotes condensation, while a facade or surface exposed to the sun can become too hot in summer.
- Check for absence of leaks, infiltration, or persistent condensation.
- Clean and degrease the surface before sanding or application.
- Choose a primer compatible with the old coating and the surface.
- Apply regular layers rather than a heavily loaded one.
- Respect the product-specific waiting times between each step.
When should you call a professional?
Call in a professional if the bubbles cover a large area, if the surface is disintegrating, if infiltration persists, or if the ceiling shows deformation. Work related to leaks, weakened structures, electrical installations, or work at height goes beyond simple finishing DIY.
A diagnosis is also useful when paint bubbles again after a complete repair. It can reveal structural moisture, faulty ventilation, or a layering of products difficult to identify visually.
Useful sources to consult
Manufacturers’ technical data sheets remain the reference for drying times, compatible surfaces, and application conditions. The resources from Tollens on blistering paints, Benjamin Moore on paint bubbles, and Zolpan for wood can complement the diagnosis, to be compared with the indications of the product actually used.
Key Takeaways
- Paint that bubbles after drying must be diagnosed before any repainting.
- Moisture, poorly prepared substrate, layers that are too thick, and insufficient drying are common causes.
- Durable repair involves scraping, sanding, drying, an appropriate primer, and a compatible finish.
- Infiltration or a severely damaged substrate requires the intervention of a professional.
Frequently Asked Questions
Can you repaint directly over bubbling paint?
No, because the new layer may peel off along with the old one. You must remove the unstable parts, check for possible moisture, prepare the substrate, and apply a suitable primer before repainting.
Do you need to remove all the paint from the wall?
Not necessarily. Remove only the areas that no longer adhere if the rest of the coating forms a hard and stable base. Broader stripping becomes necessary when there are many bubbles or multiple layers are lifting.
How can you tell if the bubbles are due to moisture?
Look at their location and check for a halo, a musty smell, a cold surface, or reappearance after a humid episode. Areas near a window, ceiling, pipe, or bathroom deserve special attention.
How long should you wait before repainting?
There is no single waiting time applicable to all substrates and paints. Wait for the drying time indicated by the manufacturer, then verify that the substrate is dry, stable, and not powdery before proceeding to the next step.
What to do if the paint still bubbles after repair?
Stop applying new layers and look for a persistent cause: infiltration, condensation, damp substrate, or product incompatibility. If the phenomenon spreads or concerns a ceiling, have a professional diagnosis made.