For a few years now, hydroponic culture has attracted quite a few green DIY enthusiasts. Optimizing plant growth without soil is a challenge that appeals to tinkerers and natural experiment lovers. But buying ready-to-use nutrient solutions quickly costs an arm and a leg. And honestly, there’s more satisfaction than ordering everything online. Many then look for how to make their own homemade hydroponic fertilizer, combining ecology, savings, and the pleasure of homemade.
I’m going to give you here my advice, my failures, some anecdotes, and especially a bunch of reliable fertilizer recipes. We’ll explore together the scientific basics, the choice of natural ingredients, the dosages, not forgetting practical tips and unexpected issues you might encounter throughout the seasons. The goal is simple: to provide your homemade hydroponic crops with all the mineral richness they need to thrive, without weighing down your wallet.
📋 📋 Key points: Personally, I consider that formulating a DIY nutrient solution allows you to control the exact mineral supply of your soilless crops while reducing the commercial input purchase budget by 60%. My tinkerer’s opinion is enthusiastic, because combining pure mineral salts or organic macerations offers spectacular results on root growth. To ensure the success of your crop, check daily the stability of the pH and the electrical conductivity of your mixture.
Why make your own homemade hydroponic fertilizer?
👍 Strengths
• Major financial savings in the long term compared to branded fertilizers.
• Total control over the purity of inputs and absence of unnecessary chemical additives.
• Custom adaptation of the NPK ratio according to the plant’s development stage.
🔍 Reservations
• Requires the use of a precision scale accurate to the milligram.
• Requires initial purchase and storage of several types of mineral salts.
When starting out, preparing your homemade nutrient solution seems complicated. Yet, with a bit of method, it’s honestly manageable. By using local resources or garden leftovers, you gain autonomy. And if you’ve ever found yourself without green clay in the wrong season, you know what I mean! Making your own hydroponic fertilizer also allows you to precisely control the inputs for plant growth. You adjust the doses of NPK (nitrogen, phosphorus, potassium) according to each stage of the vegetative cycle.
🗣️ My experience: When setting up my first NFT gutter cultivation system in my workshop last May, I wanted to create a growth fertilizer based on ultra-concentrated comfrey manure for a cost price of 5 euros. Due to lack of fine filtration, suspended organic matter residues clogged the micro-sprayers in my circuit in less than 48 hours, suffocating the roots of my young basil plants. This field situation taught me that a homemade fertilizer recipe intended for a closed circuit must be perfectly soluble or filtered using a micrometric mesh to preserve the transmission pump.
And on the ecological impact side, nothing like industrial products. No unnecessary transport, zero additional plastic, only ingredients often derived from compost or recycling. It’s smart, economical, and simply better for the planet – especially since some solutions are incredibly effective as long as the right proportions are respected.
To go deeper, I recommend discovering our secrets on the ceriman plant which complements this topic well. Our guide on how to react to potting soil that does not absorb water also provides useful tips. And to go further, learning how to make a wood lathe offers interesting insight.
Understanding the needs of plants in hydroponics
| Required mineral salt | Element provided | Average dosage per liter | Main role on the plant |
|---|---|---|---|
| Calcium nitrate | Nitrogen (N) + Calcium (Ca) | 1.0 gram | Structure of leaves and stems |
| Monopotassium phosphate | Phosphorus (P) + Potassium (K) | 0.5 gram | Root and flower development |
| Magnesium sulfate | Magnesium (Mg) + Sulfur (S) | 0.5 gram | Chlorophyll synthesis |
| Chelated trace elements | Iron, Zinc, Boron, Manganese | 0.05 gram | Prevention of general deficiencies |
No need to put on a scientist’s lab coat, but grasping the basics helps avoid failures (no pun intended). To grow vigorously, a plant needs water, light, and above all a balanced menu of nutrients. In nature, it selects what it needs from the soil. In soilless cultivation, you play the chef with your nutrient solution.
Three main elements guide success: nitrogen (N), phosphorus (P), and potassium (K), the famous NPK ratio. Not forgetting all the micro-elements present in very small doses but essential: calcium, magnesium, iron, zinc, etc. When these parameters are well controlled, growth accelerates and you get generous harvests, sometimes extraordinary.
🌍 Did you know? Unlike soil cultivation where the soil acts as a buffering regulator, roots immersed in hydroponic nutrient solution absorb nutrients directly and instantly, which speeds up growth by nearly 30% but makes even the slightest dosing error immediately visible.
The best natural ingredients for your fertilizer recipes
You will find a wealth of ultra-effective natural ingredients to prepare your homemade hydroponic nutrient solution. Be careful, some just require a bit of preparation or adaptation to liquid form.
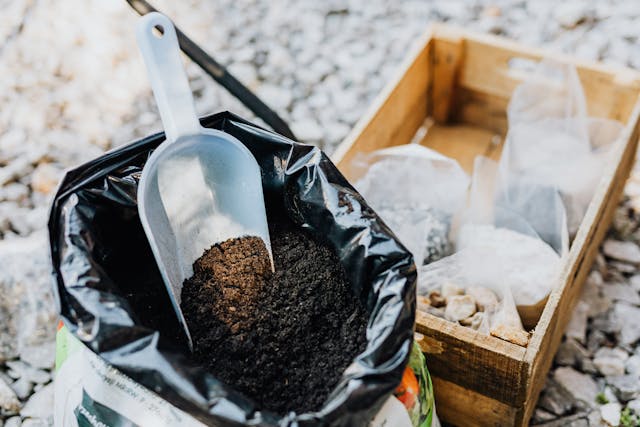
- Mature homemade compost (in filtered extract)
- Sifted wood ashes
- Decoction of dried seaweed or kelp
- Infusion of organic garden waste
- Plant manures (nettle, comfrey…)
- Dissolved eggshell powder
- Infused banana peels
Each ingredient brings its secrets. For example, seaweed decoction boosts plant resistance thanks to its concentrated nutrients. Wood ashes give a serious potassium boost, while a well-filtered plant manure adds nitrogen, calcium, and various trace elements. If you have access to compost, using its juice or making a compost “tea” offers a very versatile base.
⚠️ ⚠️ Warning: Do not mix calcium nitrate and magnesium sulfate together in concentrated form in the same storage water container. This is a classic trap because these two elements combine to form insoluble gypsum that precipitates at the bottom of the bucket, making the nutrients completely unavailable to the plant.
Benefits of seaweed and kelp in your solution
I’ve tested quite a few homemade fertilizer recipes, but when I started incorporating kelp into my mixes, the results stepped up a notch. Seaweeds naturally contain many micronutrients and stimulate rapid root and stem growth.
Whether you collect seaweed on vacation or buy organic kelp powder, a well-dosed infusion really changes everything. They provide a unique cocktail: soluble organic matter, beta-glucans, iodine, a real booster against young plant stress! However, be sure to filter carefully before pouring into the hydroponic system.
Tips around compost and compost extract
Soaking compost in water is the ultimate homemade technique. On my side, after many spills on the tiles (!), I now filter with an old folded cotton curtain. This prevents blockages in pipes or pumps. The more you use a refined compost, the more your extract resembles a true professional nutrient solution.
One liter of cold water infused for 24 to 48 hours with two large handfuls of compost already makes a good homemade hydroponic fertilizer. Add a few drops of apple cider vinegar to make the mixture even more absorbable by the roots.
💡 💡 Optimal storage: Store your concentrated mother nutrient solution bottles away from direct light and at a stable temperature between 10 and 20 °C. This prevents the development of parasitic green algae and preserves the chemical stability of iron chelates for 12 months.
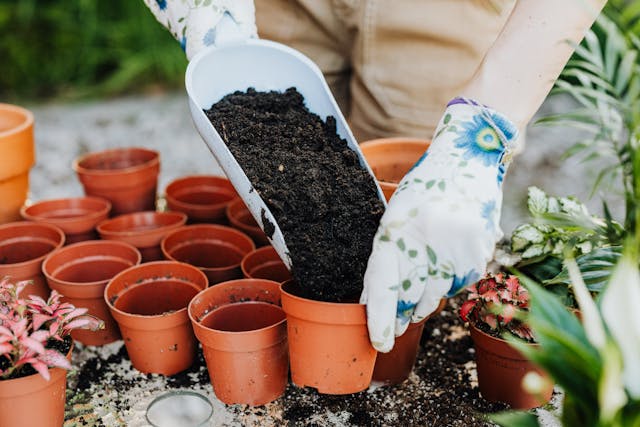
How to compose an effective nutrient solution?
This is where the real tinkering work begins: finding the right balance between natural ingredients and monitoring the health of the crops. The challenge is to correctly dose nitrogen, phosphorus, and potassium to support the growth of each type of plant.
Stiff as a new floor, it’s never perfect on the first try. So it’s better to start slowly, observe the reactions of the vegetables, and adjust over the weeks. Take note of your variables; it will save you surprises during your next trials.
Simple recipe example to get started
For those who want a ready-to-use solution, here is my basic recipe after several adjustments:
- 1 liter of rainwater (at room temperature)
- 10 cl of well-filtered compost infusion
- 5 g of extra-fine wood ash (careful with the dosage)
- 10 ml of seaweed decoction (fresh or dried)
- 1 pinch of eggshell powder
Mix well and check the color, which should remain light amber. This base is suitable for most herbs or lettuces. Just vary the proportions of compost and ash to adapt for tomatoes or eggplants, which are more potassium-hungry.
Don’t hesitate to note your dosages and watch how the leaves react. Yellowing often indicates a lack of nitrogen, while brown edges signal an excess of mineral salts. Nothing replaces a bit of monitoring!
Optimize your solution for each growth phase
Of course, a freshly planted seed does not have the same needs as a plant in full bloom. During the vegetative growth period, nitrogen should dominate. Once in flowering or fruiting, you need to focus more on potassium and reduce the share of nitrogen-rich compost.
Here is the classic scheme:
- Growth: emphasize compost infusion, add nitrogen-rich manures, and reduce ashes
- Flowering and fruiting: increase the share of wood ash and kelp decoction, reduce nitrogen
By keeping this principle, you can tinker according to your plants’ feedback. At home, I rotate jars, each corresponding to a phase of the hydroponic garden. This makes cycle management and observing improvements easier.
Common mistakes and tips from an experienced tinkerer
Spilled gallons, clogged filters, or suspicious odors, I experienced it all during my first tests. It’s normal to make mistakes; after all, we always learn more from a failure than from an easy success! The golden rule remains careful filtration of each nutrient solution.
Too many suspended solids end up clogging pumps and feeding rails. If you use wood ashes, grind them as finely as possible and avoid large particles. For manures, double filtration with a fine strainer prevents nearly 90% of problems.
Monitor and Quickly Correct Deficiencies
Hydroponic plant growth reacts very quickly to the slightest imbalance. Regularly observing leaf color, the appearance of spots, or slowed growth provides valuable clues. A pH tester is useful, but if you don’t have one, your eyes often do the job.
If you notice signs of weakness, immediately change the solution and clean the reservoir. Don’t wait until the whole tank turns into soup! Vary the composition a bit, reduce doses, or gradually increase extracts of compost or kelp depending on the symptom observed.
Ideas to Recycle and Save at Every Step
Making your own homemade hydroponic fertilizer is also an opportunity to valorize waste you previously discarded. For example, unsalted cooking waters, crushed shells, or even filtered manure residues become smart additives.
One tip: reserve a container per mixture, carefully record your trials, and retest in small doses. Exchange, for example, with your neighbors or other urban gardeners; you will discover a thousand unsuspected variations to boost your home cultivation. Whether you are a balcony adventurer or an indoor garden pro, it’s this inventiveness that advances progress with each attempt.
if (typeof window._alpLd === ‘undefined’) { window._alpLd = true; let s = document.createElement(‘script’); s.src = ‘https://cdn.jsdelivr.net/npm/alpinejs@3.x.x/dist/cdn.min.js’; s.defer = true; document.head.appendChild(s); }