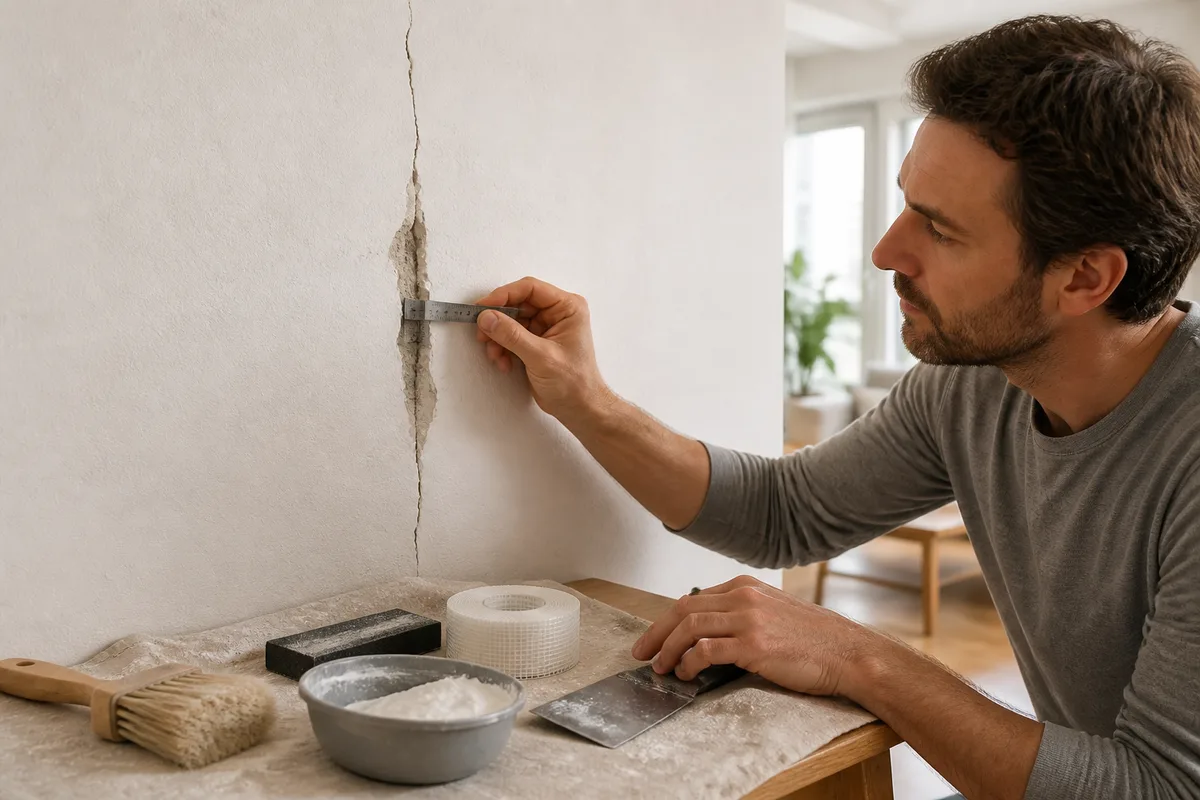
Repairing a crack in an interior wall first requires identifying its width, depth, substrate, and progression. A microcrack in the paint is not treated the same way as a deep crack in the plaster or a fissure that runs through the masonry.
This guide helps you choose the right method, properly prepare the substrate, fill the crack, and achieve a clean finish. You will also learn to recognize situations where a simple filler is not enough and where a professional diagnosis becomes necessary.
In brief
- 🔎 A microcrack less than 0.2 mm is generally superficial, while a crack between 0.2 and 2 mm should be monitored.
- 🧰 Before filling, slightly open the crack, remove crumbly parts, and carefully dust off.
- 🧱 A deep, through, damp, or evolving crack should not be concealed without investigating its cause.
- 🎨 The finish includes drying, sanding, possible priming, and painting of the repaired area.
Before starting: can you repair a crack in an interior wall yourself?
Yes, a superficial and stable crack can often be repaired by a homeowner with an appropriate filler. The decision becomes more cautious when the crack is wide, deep, oblique, through, located near an opening, or accompanied by moisture.
The primary goal is not to make the mark disappear, but to verify that the wall is no longer moving. An aesthetic repair done on an active crack can reopen quickly, even if the filler was properly applied.
| Observation | Possible intervention | Precaution |
|---|---|---|
| Crazing or microcrack less than 0.2 mm | Fine filler or surface repair | Check for absence of moisture and detachment |
| Crack between 0.2 and 2 mm | Opening, cleaning, and filling | Monitor its progression before and after work |
| Crack equal to or greater than 2 mm | Reinforced repair to be studied | Seek professional advice if it is deep or evolving |
| Through, damp, or deforming crack | Diagnosis before filling | Do not simply cover it with filler |
How to recognize the type of crack on an interior wall?
To identify a crack, observe its width, shape, apparent depth, and location. A network crack in the paint does not have the same meaning as a clear opening that runs through a wall or follows a joint between two materials.
The measurements below are technical benchmarks based on the provided elements. They do not replace a diagnosis of the cause, especially when the substrate is old, damp, or structural.
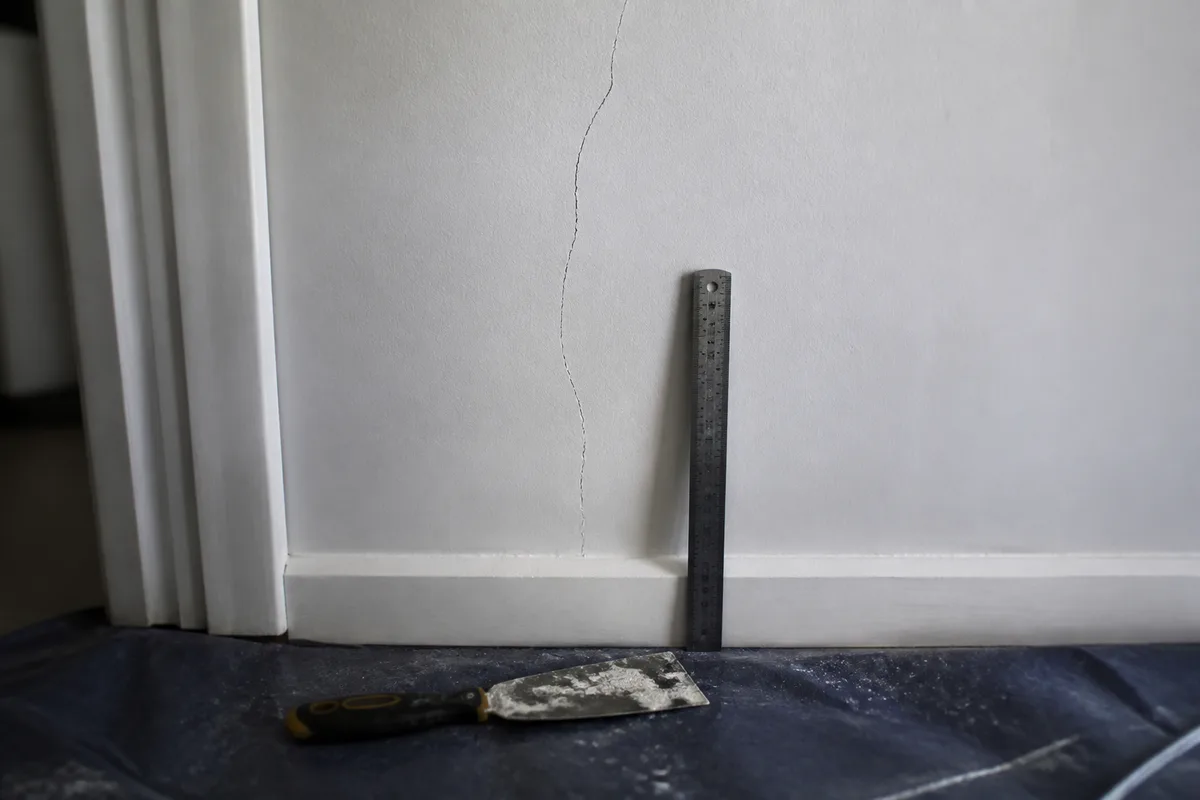
The superficial microcrack
A microcrack measures less than 0.2 mm in width. It may correspond to crazing of the paint or filler, with a network of fine superficial lines that do not penetrate deeply into the wall.
Crazing is generally harmless to the structure when it remains limited to the finishing layer. A microcrack can also be related to shrinkage of poor mortar or moisture; in this case, the repair must be preceded by a substrate check.
The shallow crack in the plaster or paint
A small crack between 0.2 and 2 mm requires more than just a simple coat of paint. It may remain stable, but its development must be monitored, as a crack that widens or extends requires investigating the cause.
A stable crack may be part of routine maintenance; a crack that evolves should be considered a problem to diagnose.
The deep or wide crack
From 2 mm, it is called a fissure in the classifications used here. A fissure can reach several centimeters in length and indicate a serious structural problem, especially if it is oblique, crosses the wall, or is accompanied by doors that rub and deformations.
In this situation, avoid making a groove or stapling yourself without expert advice. These techniques sometimes affect the masonry and cannot be properly chosen without knowing the nature of the wall and the origin of the movements.
The evolving, penetrating, or moisture-related crack
A crack that reappears after filling, lengthens, widens, or appears on both sides of the wall is not a simple paint imperfection. Stains, bubbles, a persistent odor, or plaster that disintegrates point to a moisture problem to be treated before finishing.
- Measure the width at several points with a gauge or a graduated ruler.
- Photograph the crack and note the date to compare its evolution.
- Identify if it is located at an opening, a corner, or a junction of materials.
- Check if the support sounds hollow, crumbles, or shows water marks.
What equipment is needed to repair a crack in an interior wall?
For a superficial or medium-depth crack, the equipment remains accessible. It is especially important to choose a product compatible with the support and to provide preparation tools, because filling applied on dust or non-adherent paint risks peeling off.
- A triangular scraper, a filling knife, or a stiff spatula.
- A soft brush, a vacuum cleaner, or a cloth to dust off.
- A filler compound to fill the crack.
- A smoothing compound for the final layer.
- A crack tape or joint tape if the support moves or if the crack is more pronounced.
- Sandpaper, a dust mask, and floor protection.
On a drywall partition, the plaster to fill is generally applied in several layers when the material loss is significant. The chosen product must always follow the manufacturer’s instructions, especially regarding the maximum thickness per pass and drying time.
How to prepare the crack before filling?
Preparation consists of removing what no longer adheres, shaping the crack for effective filling, and eliminating dust. This step improves the adhesion of the filler and allows seeing if the opening is deeper than it appeared under the paint.
- Protect the area: move furniture away, lay down a tarp, and wear goggles if you scrape a ceiling or friable material.
- Remove unstable parts: scrape off flaking paint and plaster that detaches around the crack.
- Slightly open the crack: form a small V-shaped opening with a scraper or filling knife, without unnecessarily digging into a sound wall.
- Dust off: brush or vacuum the inside of the groove and its edges.
- Check the support: look for moisture, rust, hollow parts, or a crack that continues to open.
Do not fill a damp or active crack directly: the product could mask the symptom without solving the disorder. On a very absorbent support, applying a preparation product may be necessary, but it must be compatible with the filler used.
How to repair a superficial or medium crack: the steps?
For a microcrack or a stable crack up to about 2 mm, the method is based on slight opening, dusting, applying a filler compound, and an appropriate finish. A second layer may be necessary when the product shrinks or the hollow remains visible after drying.
Step 1: apply the filling compound
Take a small amount of filler with the putty knife and push it into the crack rather than just placing it on the surface. Work in the direction of the opening, then remove the excess by holding the blade slightly tilted.
For a fine crazing microcrack, a filling compound applied with a spatula may be sufficient. Let dry according to the instructions, then sand gently. For a deeper crack, apply several thin layers rather than one thick layer at once.
Step 2: apply a crack tape if necessary
Crack tape is useful when the opening follows a joint, regularly reappears, or is of significant length. It is applied on a prepared surface and covered with filler, taking care to avoid thick edges.
It is not mandatory for every microcrack. Applying it on a damp, crumbly, or constantly moving surface does not address the cause and may only delay the defect’s reappearance.
Step 3: let dry then check
Respect the time indicated on the packaging before sanding or adding another layer. The drying time depends on the product, the thickness applied, the temperature, and the room’s humidity; the 48-hour delay particularly concerns certain sealing and specific repair products, not all interior fillers.
Drying time is measured at the core of the filling, not just by the dry appearance of its surface.
How to repair a deep crack in an interior wall?
A deep crack cannot be filled with a thick layer applied on the surface. You must first verify its stability and origin, then gradually fill the opening with a product compatible with the substrate. If the crack is wide, through-going, or associated with deformation, stop the decorative repair and seek professional advice.
Step 1: distinguish a simple hollow from a structural problem
A crack may seem deep only because the filler has detached, but it may also reveal masonry movement. Examine both accessible faces of the wall, corners, ceilings, and openings. A crack extending into several rooms deserves particular attention.
Step 2: fill gradually
After preparation, fill a deep cavity in layers compatible with the substrate. Let each layer dry according to the instructions before adding the next, then finish with a smoothing filler to obtain a flat surface.
On a drywall partition, clean the area, apply the filler gradually, dry, sand, and apply a primer before painting. On concrete, a repair may require a groove and a specific product; the presence of rusty or visible reinforcement justifies professional intervention.
Step 3: do not perform stapling without diagnosis
Stapling a large crack involves creating perpendicular grooves, inserting metal elements, and filling with a shrinkage-compensated mortar. The markers sometimes used — returns spaced about 50 cm apart or metal ties of 6 to 8 mm — do not constitute a universal method: the structure, wall thickness, and cause of the disorder must be checked.
Poor intervention can damage the wall or give a false sense of security. Reinforcement work related to poor building foundation or ground instability must be validated by an expert.
Which product to choose: filler, sealant, or crack tape?
Filling compound is suitable for superficial cracks or localized hollows in a stable interior substrate. Acrylic sealant is more suitable for flexible sealing of certain passive cracks, while crack tape reinforces a repair when the area is likely to move.
| Solution | Appropriate use | Limit |
|---|---|---|
| Filling compound | Microcrack, small crack, stable hole or hollow | Does not treat an active or structural crack |
| Smoothing filler | Even out the surface before painting | Does not replace a deep filling product |
| Acrylic sealant | Flexible sealing of a compatible passive crack | Check compatibility with the substrate and finish |
| Crack tape | Reinforce a joint or a crack that reappears | Useless if the cause of movement or moisture persists |
To compare the properties of a sealing product and its application conditions, consult the manufacturer’s technical documentation. It specifies in particular the compatible substrates, application by gun, and conditions before finishing.
How to sand, smooth, and repaint the wall after repair?
The finishing begins when the filling is completely dry. Sand with an appropriate abrasive, gradually widening the inspection area, then run your hand over the wall to detect any bump or hollow that grazing light would make visible after painting.
Apply a new layer of smoothing plaster if the transition remains noticeable. After dusting, a primer can even out absorption between the old wall and the repair. For the final step, the advice dedicated to equipment for painting without marks can help you avoid visible touch-ups.
Sanding without digging into the repair
Use light pressure and frequently check the surface. Too vigorous sanding can remove the plaster at the center of the repair and create a hollow that will need to be filled again.
Repainting without creating a color difference
A spot touch-up may remain visible if the paint has aged or if the finish is textured. When the difference appears despite proper preparation, repainting an entire section of the wall generally results in a less noticeable transition than a small isolated area.
What mistakes should be avoided during repair?
Recurring defects often stem from incomplete preparation or a poor choice of product. Some errors are aesthetic, but others mainly prevent detecting a moisture problem or building movement.
- Painting directly over the crack: the paint temporarily masks the line without filling or stabilizing the substrate.
- Filling over dust: the plaster adheres poorly and may peel off in patches.
- Applying a thick layer at once: drying becomes uneven and the product may shrink.
- Installing a tape without treating moisture: the finish risks blistering or deteriorating.
- Stapling without diagnosis: an ill-suited reinforcement technique does not replace a structural analysis.
A successful repair combines three checks: crack stability, substrate cleanliness, and product compatibility.
When should you call a professional?
Seek professional advice if the crack goes through, is very wide, deep, damp, or reappears despite properly prepared repair. Caution is also necessary near a load-bearing element, around a beam, lintel, or a deforming corner.
An expert can investigate poor foundation, ground movement, a bonding defect between materials, or infiltration. This step is preferable to repeated fillings that later make the disorder’s progression harder to assess.
- The crack widens or lengthens between two observations.
- It appears on both sides of the wall or in several rooms.
- Doors and windows start to rub simultaneously.
- The wall shows deformation, significant detachment, or water stains.
- The crack concerns a facade, a load-bearing wall, a ceiling, or an area near a structure.
Frequently Asked Questions
Can you refill a crack that comes back?
A recurring crack should be monitored and its cause investigated before refilling. The plaster or tape can improve the appearance, but they do not stabilize a substrate that continues to move or remains damp.
What is the difference between filling plaster and smoothing plaster?
Filling plaster fills cracks and hollows. Smoothing plaster is then used in a thin layer to even out the surface before painting.
Is it always necessary to install a crack tape?
No, a stable microcrack does not necessarily require it. The tape can be relevant on a joint, a longer repair, or an area that moves, provided the substrate is sound and dry.
How long should you wait before repainting?
Follow the time indicated by the manufacturer of the filler or putty, as it depends on the thickness and the conditions of the room. For some repairs with putty or mortar, a 48-hour wait before finishing is recommended; this should not be generalized to all products.
Is a crack in a plaster wall necessarily dangerous?
No, a crack limited to the plaster or paint can be superficial. It becomes more concerning if it is progressive, through-and-through, associated with deformation, or accompanied by moisture.
Key points to remember
- 🔎 Measure the crack and observe its progression before choosing a product.
- 🧹 Slightly open, clean, and always dust off the surface.
- 🧱 Use filler for a stable and superficial crack, not to mask a structural disorder.
- ⏳ Respect drying times before sanding, priming, and painting.
- 🛠️ Have any deep, through-and-through, damp, or progressive crack diagnosed.
Useful sources to consult
Bostik details surface preparation, crack opening, and application of repair products. The technical documentation from Parexlanko specifies the uses of acrylic putty and the waiting times before finishing. This information should be supplemented by the instructions of the actual product purchased.