.en-bref { max-width: 640px; margin: 2em auto; padding: 1.5em 1.8em; color: #78350f; font-family: “Inter”, “Segoe UI”, sans-serif; text-align: left; position: relative; box-sizing: border-box; background: #fffaf0; border: 1px solid #b45309; border-left: 6px solid #b45309; border-radius: 8px; box-shadow: 0 8px 24px rgba(251, 191, 36, 0.15); }
.en-bref h2, .en-bref .en-bref-header { font-size: 1.15em; font-weight: 700; margin-bottom: 0.6em; color: #b45309; }
.en-bref p, .en-bref li { font-size: 1em; line-height: 1.65; margin: 10px; }
.en-bref strong { color: #451a03; }
.key-takeaways { max-width: 640px; margin: 2em auto; padding: 1.5em 1.8em; color: #78350f; font-family: “Inter”, “Segoe UI”, sans-serif; text-align: left; position: relative; box-sizing: border-box; background: #fffaf0; border: 1px solid #b45309; border-left: 6px solid #b45309; border-radius: 8px; box-shadow: 0 8px 24px rgba(251, 191, 36, 0.15); }
.key-takeaways h2, .key-takeaways .key-takeaways-header { font-size: 1.15em; font-weight: 700; margin-bottom: 0.6em; color: #b45309; }
.key-takeaways p, .key-takeaways li { font-size: 1em; line-height: 1.65; margin: 10px; }
.key-takeaways strong { color: #451a03; }
.key-takeaways ul { list-style: none; padding-left: 0; }
.key-takeaways li { margin: 0.45em 0; padding-left: 0.2em; }
.mg-callout{margin:1.5em 0;padding:.9em 1.1em;border:1px solid;border-left-width:4px;border-radius:10px;font-size:.97em;line-height:1.65}.mg-callout>:first-child{margin-top:0}.mg-callout>:last-child{margin-bottom:0}.mg-callout__label{display:block;margin:0 0 .35em;font-weight:700;font-size:.82em;letter-spacing:.03em;text-transform:uppercase}.mg-callout__label::before{margin-right:.45em;font-size:1.05em;vertical-align:-.06em}.mg-callout–info{background:#eff6ff;border-color:#bfdbfe;color:#1e3a5f}.mg-callout–info .mg-callout__label{color:#2563eb}.mg-callout–info .mg-callout__label::before{content:”2139FE0F”}.mg-callout–tip{background:#f0fdf4;border-color:#bbf7d0;color:#14532d}.mg-callout–tip .mg-callout__label{color:#15803d}.mg-callout–tip .mg-callout__label::before{content:”1F4A1″}.mg-callout–warning{background:#fffbeb;border-color:#fde68a;color:#7a4a10}.mg-callout–warning .mg-callout__label{color:#b45309}.mg-callout–warning .mg-callout__label::before{content:”26A0FE0F”}.mg-callout–danger{background:#fef2f2;border-color:#fecaca;color:#7f1d1d}.mg-callout–danger .mg-callout__label{color:#dc2626}.mg-callout–danger .mg-callout__label::before{content:”1F6D1″}.mg-proscons{display:grid;grid-template-columns:1fr 1fr;gap:16px;margin:1.5em 0}@media(max-width:560px){.mg-proscons{grid-template-columns:1fr}}.mg-proscons__col{padding:.9em 1.1em;border:1px solid;border-radius:10px}.mg-proscons__title{display:flex;align-items:center;gap:.4em;margin:0 0 .5em;font-weight:700;font-size:.9em;letter-spacing:.02em}.mg-proscons__col ul{margin:.3em 0 0;padding-left:1.15em}.mg-proscons__col li{margin:.3em 0;line-height:1.55}.mg-proscons__col–pro{background:#f0fdf4;border-color:#bbf7d0;color:#14532d}.mg-proscons__col–pro .mg-proscons__title{color:#15803d}.mg-proscons__col–pro .mg-proscons__title::before{content:”2705″}.mg-proscons__col–con{background:#fef2f2;border-color:#fecaca;color:#7f1d1d}.mg-proscons__col–con .mg-proscons__title{color:#dc2626}.mg-proscons__col–con .mg-proscons__title::before{content:”274C”}.mg-steps{list-style:none;counter-reset:mgstep;margin:1.5em 0;padding:0}.mg-steps__item{counter-increment:mgstep;position:relative;padding:0 0 1.1em 3.2em;min-height:2.4em}.mg-steps__item:last-child{padding-bottom:0}.mg-steps__item::before{content:counter(mgstep);position:absolute;left:0;top:0;width:2.2em;height:2.2em;line-height:2.2em;text-align:center;border-radius:50%;background:#2563eb;color:#fff;font-weight:700;font-size:.95em}.mg-steps__title{margin:.15em 0 .3em;font-weight:700}.mg-steps__item>:last-child{margin-bottom:0}.mg-kpis{display:grid;grid-template-columns:repeat(auto-fit,minmax(140px,1fr));gap:14px;margin:1.5em 0}.mg-kpi{padding:1em .9em;border:1px solid #e5e7eb;border-radius:12px;background:#f9fafb;text-align:center}.mg-kpi__value{display:block;font-size:1.7em;font-weight:800;line-height:1.15;color:#111827}.mg-kpi__label{display:block;margin-top:.35em;font-size:.85em;color:#6b7280;line-height:1.35}
.wp-block-image,.ai-image{margin-bottom:1.75em}.wp-block-image>figcaption,.ai-image>figcaption{margin-top:.5em}
Preparing a Wall Before Painting: The Complete Method for a Lasting Finish
Preparing a wall before painting involves making the surface clean, dry, sound, smooth, and sufficiently adhesive before applying the color. The method begins with inspecting the wall, then continues with cleaning, filling, sanding, dusting, and priming.
This guide explains how to prepare a wall before painting it according to its actual condition. You will find a list of materials, a step-by-step progression, a diagnostic table, simple checks, and mistakes to avoid so as not to trap moisture, mold, or poorly adhering paint under a new finish.
In Brief
- 🧽 A wall must be clean, dry, sound, and dust-free before any painting.
- 🛠️ Holes, cracks, and old flakes must be treated before the final sanding.
- 🎨 The primer improves adhesion and regularizes absorption on porous or repaired surfaces.
- ⚠️ Infiltration, active mold, or a structural crack must be treated at its source, not just covered up.
Why Prepare a Wall Before Painting?
A finish coat easily reveals defects in the surface: bumps, grease marks, old drips, dust, and differences in absorption. Insufficient preparation can also cause visible touch-ups, poor adhesion, or premature flaking.
However, preparation does not follow exactly the same intensity for a new wall, an old paint in good condition, or a very damaged surface. The right approach is to diagnose before buying products: treating the entire wall when only a few areas are damaged adds work, while a local repair on a very uneven surface leaves visible differences.
A wall ready to paint is not just a wall that looks clean: it must also be dry, stable, non-powdery, and even to the touch.
How to Examine the Condition of the Wall Before Starting?
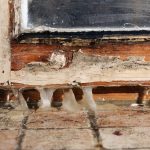
To examine a wall, shine light at an angle, run your hand over its surface, and check areas around windows, baseboards, and wet rooms. Look for blisters, flakes, cracks, black marks, stains, and white powder that deposits on your fingers.
This check determines the next steps. An old paint that adheres well mainly requires cleaning and light preparation, while a powdery, damp, or heavily damaged wall should not be painted immediately.
| Surface Condition | Problem to Address | Recommended Preparation | Point of Caution |
|---|---|---|---|
| Wall painted in good condition | Dirt or shine | Cleaning, light dulling if necessary, dusting | Check adhesion of the old paint |
| Moderately damaged wall | Holes, small chips, fine cracks | Local scraping, filler, sanding, and primer | Do not leave excess filler thickness |
| Heavily damaged wall | Many bumps, uneven surface | More general filling, sanding, and priming | Allow more drying time and checks |
| Damp or moldy wall | Infiltration, condensation, or contamination | Identify and eliminate the cause before repair | Do not hide the problem with paint |
| Wall with wallpaper | Textured, glossy, or peeling surface | Remove the covering before preparation | Check the wall condition after removal |
To test old paint, rub a small area with a damp cloth then observe if it crumbles, or use masking tape on a discreet part. If fragments detach, scrape the fragile areas before proceeding further.
What Materials Are Needed to Prepare a Wall?
The materials needed to prepare a wall depend on its condition, but some tools cover most interior preparations. Work with products compatible with the surface and follow the instructions on their packaging, especially for application and drying.
- A tarp for the floor and protections for the furniture;
- Masking tape for baseboards, doors, windows, and switches;
- A sponge, a bucket, a lint-free cloth, and a degreasing product;
- A scraper or a putty knife;
- A filler for holes and cracks;
- A smoothing compound when the surface has many superficial defects;
- Fine sandpaper, often between grits 150 and 180 for finishing;
- A soft brush, a vacuum cleaner suitable for dust, and a protective mask;
- A roller and a brush for the primer.
Protect the floors and furniture before washing or sanding. The edge masking must be applied on a clean and dry surface to limit product infiltration under the tape.
If you also need to prepare metal elements, sanding metal with the right technique involves different constraints than those of a wall: do not automatically reuse the same abrasives or products.
How to clean and degrease a wall before painting?
Cleaning a wall before painting removes dust, grease, nicotine, and residues that prevent paint from adhering. Start by dusting, then wash from top to bottom with a solution adapted to the degree of dirtiness, rinse, and let dry completely.
In a kitchen or bathroom, focus on areas near the stove, sink, shower, and switches. A soda wash or a degreasing product can be used depending on the nature of the surface and the manufacturer’s instructions; wear gloves and ventilate the room.
- Dust the wall with a soft brush or vacuum cleaner, removing cobwebs and loose particles.
- Prepare the cleaning product according to its label, without mixing several chemical products.
- Wash in small sections, from ceiling to floor, to avoid dripping dirt onto an already cleaned surface.
- Rinse with a clean sponge and clear water to remove detergent residues.
- Dry the wall completely before any filling or primer application.
Dusting after sanding is a preparation step: a fine layer of powder is enough to disrupt the adhesion of the primer.
For an isolated stain, clean first and observe its evolution after drying. A halo that reappears may indicate an old infiltration; in this case, paint should not be used to hide the cause.
How to remove old layers that no longer adhere?
Remove all peeling, blistered, or crumbly paint with a scraper, then sand the edges to reduce the marking. The goal is not necessarily to remove every old layer but to keep only a stable, clean, and sufficiently matte base to receive the next layers.
Do not paint directly over wallpaper, especially if it is glossy, textured, or partially detached. Remove it, eliminate glue residues, let the surface dry, then treat defects that appeared after removal.
How to fill holes and repair cracks in a wall?
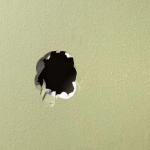
To fill a wall, choose a filler for cavities and a smoothing compound for superficial defects. Slightly open a fine crack with a cutter if necessary, dust it, slightly moisten the surface when the product requires it, then fill it without creating a bulge.
Deep holes may require several applications rather than a too thick layer. Respect the drying time indicated by the manufacturer: it varies according to thickness, temperature, humidity, and room ventilation, and a surface that appears dry may still be soft inside.
- Scrape the parts that detach around the defect.
- Dust the cavity with a brush or dry cloth.
- Apply the filler with a knife, pressing it against the wall.
- Let dry according to the instructions before touching or sanding the repair.
- Add a second coat if the filler shrinks leaving a hollow after drying.
A crack that widens, crosses several materials, follows a construction joint, or is accompanied by deformation is not a simple decorative filling issue. Have its cause investigated by a professional before proceeding.
How to sand a wall before painting without creating defects?
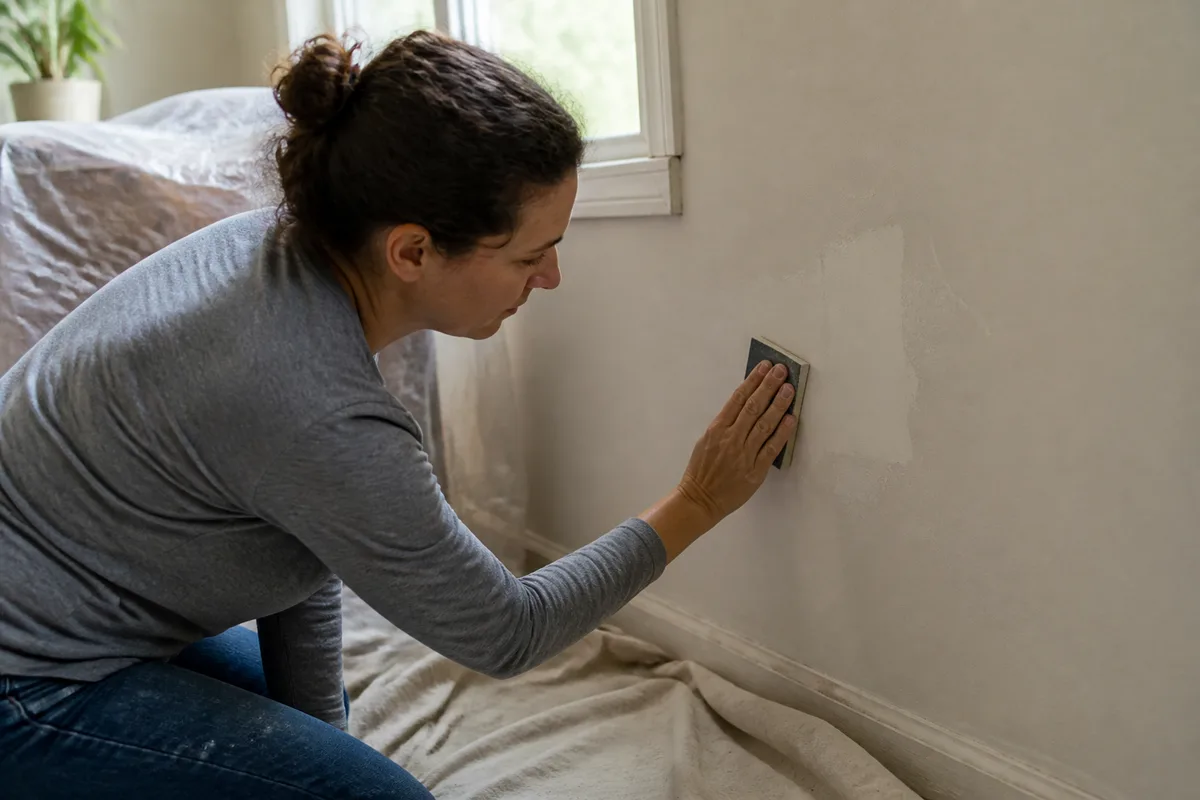
Sanding a wall before painting is used to remove excess plaster thickness, small rough spots, and transitions between old layers. Use consistent pressure, an appropriate abrasive, and dust protection; sanding too aggressively can gouge the surface or reveal a fragile old layer.
For finishing plaster, a fine abrasive with a grit of 150 to 180 is often recommended, subject to the product’s instructions. Sand with regular movements, frequently check with the palm of your hand, and illuminate the wall from the side to spot defects that are not visible when facing the surface.
After sanding, carefully vacuum the dust, wipe with a cloth slightly suited to the surface, then wait for the wall to be completely dry. The primer should never be applied on a surface that is still powdery.
Which primer to choose and how to apply it?
The primer is particularly useful on a new, porous, repaired, heterogeneous wall or one covered with old areas of different paint. It regularizes absorption, promotes adhesion of the finish, and limits variations in appearance between the surface and repairs.
Choose a primer compatible with the surface: plaster, plasterboard, old paint, or a surface presenting a particular difficulty. Apply it on a clean and dry wall, without trying to compensate for defects that should have been plastered or sanded with a thick coat.
| Surface | Product to consider | Objective |
|---|---|---|
| New plaster or plasterboard | Primer for porous surfaces | Regularize absorption |
| Wall repaired with several plasters | Compatible primer | Even out the base |
| Old sound and matte paint | Primer according to the finishing paint | Improve compatibility if necessary |
| Difficult or very absorbent surface | Suitable primer recommended by the manufacturer | Avoid differences in drying and appearance |
Work in regular strips and avoid going over an area that is starting to dry for a long time. The time before applying the finishing paint depends on the product: consult the instructions rather than relying on a universal delay.
For the final phase, the choice of roller and brush also influences the uniformity of the result. These criteria are detailed in this guide dedicated to equipment for painting a wall without marks.
Which special cases require different preparation?
New, porous, old, or stained walls do not react the same way. Adapt the preparation to the nature of the surface instead of systematically applying the same sequence of products.
New plaster or plasterboard wall
Carefully dust new surfaces, treat joints and screw heads, sand repairs, then apply a primer intended for absorbent surfaces. Checking with grazing light is useful to spot visible joints before finishing.
Previously painted wall in good condition
Wash, rinse, and dry the surface. If the old paint is glossy, slight sanding can improve adhesion; then remove all dust before applying the primer or compatible paint.
Heavily damaged or powdery wall
On a moderately damaged wall, locally treat holes and cracks before sanding. On a heavily degraded surface, a general plastering may be necessary, followed by sanding and a primer coat. A powdery surface must be stabilized with a suitable product, after checking its cause.
Stained, damp or moldy wall
Mold must be cleaned with the precautions specified by the product used, then the wall should be rinsed if necessary and thoroughly dried. The cause of the moisture — leak, infiltration, condensation or ventilation defect — must be corrected before painting.
Anti-stain or anti-mold paint does not replace the elimination of an infiltration or a persistent source of moisture.
What mistakes compromise durable painting?
The most common defects appear when preparation is reduced to a simple roller stroke. They are often avoidable with additional checks between steps.
- Painting on a damp wall: residual water can cause blistering or degradation of the paint film. Wait for complete drying and investigate the cause of the moisture.
- Forgetting to degrease: kitchen grease or nicotine remain adhesion barriers. Wash, rinse and dry before repairing.
- Covering peeling paint: the new coat will follow an unstable substrate. Scrape fragile areas and smooth the edges.
- Sanding then priming without dust removal: the powder forms an interface between the wall and the primer. Vacuum and clean the surface.
- Using incompatible filler: a repair that is too soft, too absorbent or not properly dried may show through the finish. Check the manufacturer’s instructions.
How to know if the wall is ready before painting?
The wall is ready when its surface is clean, dry, stable, uniform and not powdery. Side lighting should no longer reveal significant relief, repairs must be hard to the touch and no moisture odor should remain.
Before opening the finish can, run a clean hand over several areas, observe the corners and check that the masking tape sticks to a dry surface. This final inspection prevents discovering a defect after applying the paint.
- ☐ Furniture and floor are protected.
- ☐ Old crumbly parts have been removed.
- ☐ The wall has been cleaned, rinsed and dried.
- ☐ Holes and cracks have been filled.
- ☐ Repairs have been sanded without excess thickness.
- ☐ All dust has been removed.
- ☐ The primer is compatible and dry according to its instructions.
Key takeaways
- 🧱 Adapt preparation to the actual condition of the wall, not just its appearance.
- 🧽 Clean, rinse and dry before filling or applying a primer.
- 🛠️ Sand repairs with a fine abrasive, then remove all dust.
- 🎨 Use a compatible primer on porous, repaired or heterogeneous substrates.
- ⚠️ Treat any moisture, active mold or significant crack before painting.
Frequently asked questions
Is it always necessary to sand a wall before painting?
No. A wall in good painted condition may only require cleaning and slight dulling if it is glossy. However, old repairs, flakes and level differences must be sanded before priming.
Can you paint directly over old paint?
Yes, if it is perfectly adherent, clean, dry and compatible with the new finish. Remove blistered or crumbly areas, treat glossiness and perform a test on a small area if the nature of the two paints is uncertain.
How long should you wait after filling?
Wait the time indicated on the filler packaging. It varies depending on the thickness applied, ventilation, temperature and humidity; sanding or painting too early can cause a depression, a mark or poor adhesion.
How to prepare a wall that has mold?
Do not paint directly over it. Clean the mold with an appropriate product, protect yourself, ventilate the room and especially investigate the cause of the moisture before repairing and painting.
When should you call a professional?
Seek professional advice if the wall remains damp, if cracks are large or evolving, if the substrate is largely disintegrating or if an intervention affects the structure. A simple filler does not solve these problems.
.magic-lb-overlay{position:fixed;inset:0;background:rgba(15,23,42,.92);display:none;align-items:center;justify-content:center;z-index:99999;cursor:zoom-out;padding:20px}
.magic-lb-overlay.open{display:flex}
.magic-lb-overlay img{max-width:95vw;max-height:95vh;object-fit:contain;border-radius:8px;box-shadow:0 8px 32px rgba(0,0,0,.5)}
.magic-lb-close{position:absolute;top:16px;right:20px;color:#fff;background:rgba(0,0,0,.5);border:none;width:40px;height:40px;border-radius:50%;font-size:24px;cursor:pointer;display:flex;align-items:center;justify-content:center}
.magic-lb-close:hover{background:rgba(0,0,0,.8)}
.wp-block-image img{cursor:zoom-in;transition:transform .15s ease}
.wp-block-image img:hover{transform:scale(1.01)}
.magic-img-link{display:inline-block;text-decoration:none}
(function(){
var ov=document.getElementById(‘magic-lb’);if(!ov)return;
var img=ov.querySelector(‘img’),btn=ov.querySelector(‘.magic-lb-close’);
function open(src){img.src=src;ov.classList.add(‘open’);document.body.style.overflow=’hidden’}
function close(){ov.classList.remove(‘open’);img.src=”;document.body.style.overflow=”}
document.addEventListener(‘click’,function(e){
var a=e.target.closest(‘a.magic-img-link’);
if(a){e.preventDefault();open(a.getAttribute(‘href’));return}
var i=e.target.closest(‘.wp-block-image img’);
if(i&&!e.target.closest(‘a’)){e.preventDefault();open(i.currentSrc||i.src)}
});
ov.addEventListener(‘click’,function(e){if(e.target===ov||e.target===btn)close()});
document.addEventListener(‘keydown’,function(e){if(e.key===’Escape’)close()});
})();