When you embark on renovation or construction, there are always details that seem trivial but make all the difference in everyday life. This is exactly the case with the installation direction of an air vent grille on a window. Many think it’s just an accessory to look nice or to comply with regulations. Yet, poor positioning, incorrect orientation, or even an unsuitable choice for PVC joinery can turn your comfortable living room into an unpleasant draft zone, or even compromise the indoor air quality. So, we will talk concretely about the choice of the right location (frame, sash, top rail), the installation direction, and all those little details that make a window air vent grille effective… or not!
📍 My experience: During a renovation in Strasbourg in 2022, I installed the living room deflectors facing down by mistake. From the first chills of November, the client complained about a cold draft falling directly on the back of his neck when he was sitting on his sofa. I had to come back to dismantle and flip the plastic covers. The lesson learned is that you must always check the direction of the directional slot before clipping on the final cover.
What are the essential roles of a window air vent grille?
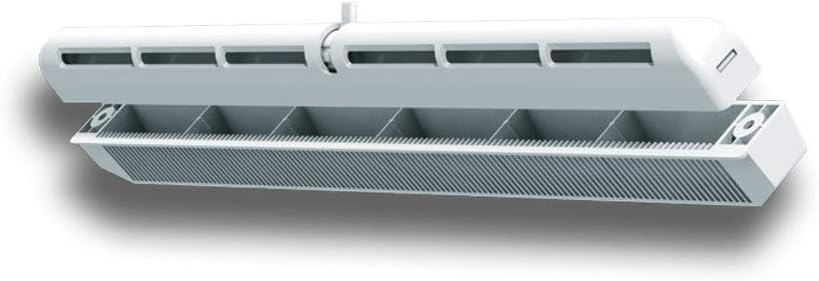
Before tackling the question of installation direction, let’s take a moment to recall what a window air vent grille is really for. First, it allows essential air circulation, especially in well-insulated modern homes. And believe me, nothing is more annoying than a house that smells stuffy because ventilation was forgotten.
📍 My experience: During a renovation in Strasbourg in 2022, I installed the living room deflectors facing down by mistake. From the first chills of November, the client complained about a cold draft falling directly on the back of his neck when he was sitting on his sofa. I had to come back to dismantle and flip the plastic covers. The lesson learned is that you must always check the direction of the directional slot before clipping on the final cover.
Even if humidity and indoor air quality are not visible at first glance, their impact is real: mold on walls, heavy condensation on windows, and sometimes persistent odors after cooking or a raclette evening with friends. All this, a simple well-placed air vent grille can prevent!
To ensure healthy air in your home, I recommend understanding why I have mold stains on my windows, which complements this topic well. If your extraction system is old, knowing how to adjust a noisy ventilation system also provides useful tips. And to go further in your work, our guide to properly choose and install your joinery offers interesting insights.
Prevention of domestic humidity problems
One of the primary roles of the window ventilation grille is to ensure air renewal to evacuate the moisture produced by our daily activities. Without this air intake, the humidity level quickly rises and you easily end up with black spots behind a piece of furniture pushed against the wall, especially in the kitchen or bathroom. I experienced this in an old student room — a real mold laboratory!
By ensuring this constant airflow, the grille limits the risk of fungus growth and thus preserves the health of your walls, as well as that of the occupants.
⚠️ Common mistake
Thinking that the inner fins should point downwards to prevent rain or dust from entering. This is false: the weather protection role is ensured only by the outer hood. If you position the inner grille facing down, you will waste a lot of heating energy.
Guarantee of good indoor air quality
We don’t always realize it, but the air inside a house can be up to five times more polluted than outdoor air. Household products, cooking, painting, everything ends up stagnating without air renewal. Thanks to the window ventilation grille, pollutants gradually evacuate, making the atmosphere much more pleasant.
A well-ventilated house also means fewer dust mites, fewer allergies, and a better feeling of freshness, especially in bedrooms and wet areas.
Understanding the installation direction and orientation of a window ventilation grille
🌍 Did you know?
Since warm air is lighter than cold air, it naturally accumulates near your ceiling. By directing the fresh outdoor air intake (often at 5°C in winter) upwards, the two airflows mix instantly. The air that then falls back into the room is thus preheated, avoiding any thermal discomfort.
The trickiest detail with ventilation grilles is really the installation direction. Oh, how many times I’ve seen a skilled DIYer install their grille upside down or misoriented, ultimately creating more draft disturbances than anything else. To understand well, here are the main criteria to consider.
Depending on its direction and orientation, a grille will favor either air intake or exhaust. The setting depends on the model, the climate of your region, and especially the location of your window in the room.
Orientation according to the window location (frame, sash, upper crossbar)
| Internal deflector orientation | Direction of incoming air | Perceived cold sensation | Mixing efficiency |
|---|---|---|---|
| Slot facing up (recommended) | Towards the ceiling | Very low | Excellent (100%) |
| Slot facing down (not recommended) | Towards the floor | Strong and unpleasant | Poor (40%) |
| Horizontal slot | Straight ahead | Moderate | Good (75%) |
| Intentionally blocked grille | No airflow | None | Dangerous (0%) |
The frame (the fixed frame) is often the ideal candidate because it does not move during frequent openings. If the grille is planned on the sash (the movable part), care must be taken that it does not interfere with either the closing or the operation of the hardware, especially on PVC joinery where some accessories are bulky. As for the top rail, this is often where the installation is most logical, because warm air naturally rises. Installing the grille on the top rail therefore promotes optimal circulation without creating too direct a draft at the level of the sofa or bed.
For two-level homes, placing the living room ventilation grille on the top rail of the window and another, lower, near the floor or an interior door, allows for effective air mixing.
Installation direction to ensure adequate air intake
Manufacturers often provide diagrams with arrows engraved on the grille indicating the recommended direction. A little field tip: these arrows are not decorative! Generally, the slanted part of the fins should point towards the ceiling, not towards the floor.
This orientation allows the airflow to be slightly deflected upwards, avoiding the unpleasant effect of cold air falling directly on you when you pass in front of the window. This detail makes a real difference, especially in a north-facing bedroom or office.
🔧 Tip
Before permanently screwing the plastic bracket onto the joinery, slip a small 2-millimeter acoustic foam gasket between the grille and the wood or PVC. This helps absorb wind-related vibrations and significantly reduces street noise.
Where to install the grille: positioning relative to the door, ceiling, and actual site conditions
✅ Advantages of an upward orientation
- Optimal thermal mixing of the room
- Total elimination of condensation
- No sensation of cold drafts
🔻 Limitations of a downward installation
- Direct cooling of the floor and ankles
- Overconsumption of radiators located below
- Risk of mold in the upper corners
When you arrive on a site or want to equip your new house, the question always comes up: “Where to install this darn window ventilation grille?” Some think it is enough to follow the instructions, but each configuration has its subtleties.
The neighbor already told me he installed a grille right in the middle of his triple-glazed window, without thinking about the proximity of the ceiling or the furniture arrangement. Result: cold air intake right above the dining table, guaranteed freezing atmosphere every winter! Here are some concrete guidelines to do it right.
- Avoid positions facing an entrance door: you multiply very unpleasant cross drafts for those passing by.
- Favor the top rail or failing that, place the grille sufficiently far from the floor to limit direct thermal shocks.
- On a window near a low ceiling, rather place it on the freest corner, where the air naturally circulates when it warms up.
- In an open room (living room, living-dining-kitchen), think about alternating the positioning between a grille on the window side and another by mechanical extraction in the kitchen or the adjoining bathroom.
- Always check the compatibility of the grille with the PVC joinery if you are working on this material: some profiles require specific models.
Each case is particular. On a sliding glass door opening onto a terrace, it is better to install the ventilation grille in a place little exposed to bad weather to prevent rain from dripping inside.
If several windows coexist in the same room, distributing the window ventilation grilles ensures better balance and avoids the famous sensations of directional drafts, responsible for many colds in mid-season!
Practical steps to successfully install a ventilation grille on a window
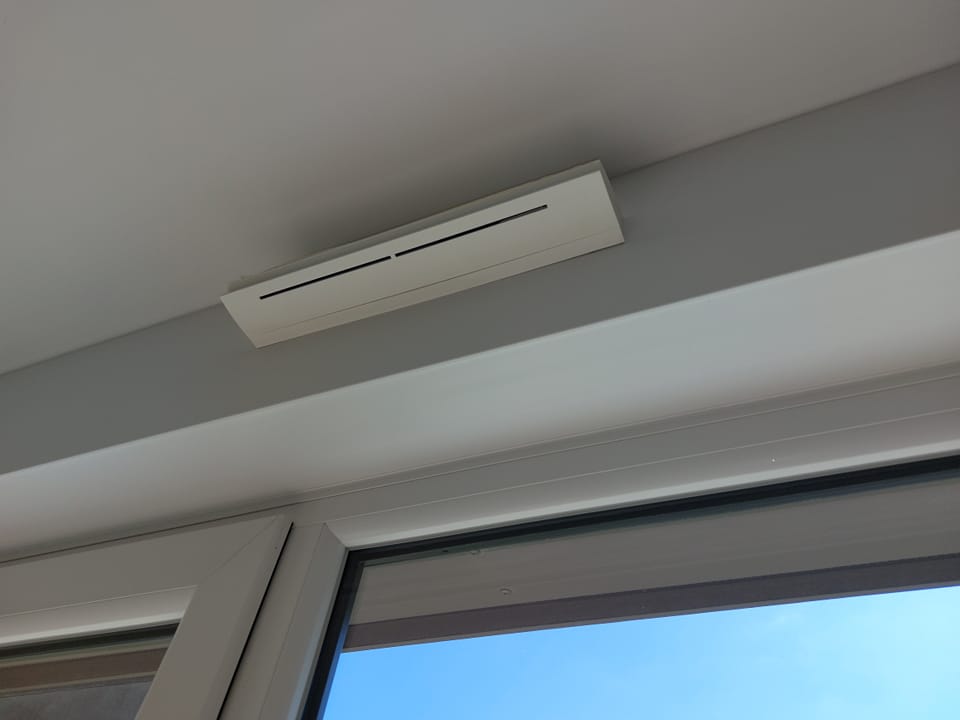
Installing a window ventilation grille is not rocket science, but it requires being methodical. If you don’t want to drill three times, always start by carefully locating the right spot then validate the installation direction and the compatibility with the PVC joinery, if there is any.
An essential tool: the drill equipped with a hole saw adapted to the diameter of the grille. A tip from an old hand: protect the glass and the joints before drilling! A wrong move and the double glazing is ruined, and then, it’s a guaranteed hassle.
- Install the grille on the inside when the outside space is exposed to wind or rain.
- Remember to check for the absence of cables or metal reinforcements in the crosspiece before drilling.
- Make sure that the created opening respects the regulatory ventilation surface, otherwise the mechanical ventilation system will be useless.
- Don’t forget the peripheral seal provided with most grilles to block moisture at the cutout: this will save you from sneaky infiltrations year after year.
- Always orient the fins to deflect the airflow towards the ceiling (and not towards the floor or directly towards seated people).
If you live in a noisy area, equip yourself with an acoustic model. They cost a bit more, but you keep the comfort of effective ventilation while limiting noise from the street. Sound insulation remains compatible with a proper air intake, provided you do not forget the appropriate installation direction.
Never forget to regularly maintain the grille. A blocked window ventilation grille quickly becomes counterproductive, a source of condensation that blackens the frame or the hidden corners of the sash.
Additional tips and tricks from the field
We learn a lot by observing how installations age. For example, on white PVC joinery, the slightest rust streak appears very quickly around a poorly installed grille. Also think about adapting the color or model to the overall finish, so as not to break the visual harmony of the window.
Another tip, favor removable or washable grille models, it’s very practical for maintaining good indoor air quality. If you feel an inappropriate cold draft after installation, simply remove and reverse the grille to adjust the installation direction. Sometimes, just flipping the element drastically reduces this discomfort.