.en-bref { max-width: 640px; margin: 2em auto; padding: 1.5em 1.8em; color: #78350f; font-family: “Inter”, “Segoe UI”, sans-serif; text-align: left; position: relative; box-sizing: border-box; background: #fffaf0; border: 1px solid #b45309; border-left: 6px solid #b45309; border-radius: 8px; box-shadow: 0 8px 24px rgba(251, 191, 36, 0.15); }
.en-bref h2, .en-bref .en-bref-header { font-size: 1.15em; font-weight: 700; margin-bottom: 0.6em; color: #b45309; }
.en-bref p, .en-bref li { font-size: 1em; line-height: 1.65; margin: 10px; }
.en-bref strong { color: #451a03; }
.key-takeaways { max-width: 640px; margin: 2em auto; padding: 1.5em 1.8em; color: #78350f; font-family: “Inter”, “Segoe UI”, sans-serif; text-align: left; position: relative; box-sizing: border-box; background: #fffaf0; border: 1px solid #b45309; border-left: 6px solid #b45309; border-radius: 8px; box-shadow: 0 8px 24px rgba(251, 191, 36, 0.15); }
.key-takeaways h2, .key-takeaways .key-takeaways-header { font-size: 1.15em; font-weight: 700; margin-bottom: 0.6em; color: #b45309; }
.key-takeaways p, .key-takeaways li { font-size: 1em; line-height: 1.65; margin: 10px; }
.key-takeaways strong { color: #451a03; }
.key-takeaways ul { list-style: none; padding-left: 0; }
.key-takeaways li { margin: 0.45em 0; padding-left: 0.2em; }
.mg-callout{margin:1.5em 0;padding:.9em 1.1em;border:1px solid;border-left-width:4px;border-radius:10px;font-size:.97em;line-height:1.65}.mg-callout>:first-child{margin-top:0}.mg-callout>:last-child{margin-bottom:0}.mg-callout__label{display:block;margin:0 0 .35em;font-weight:700;font-size:.82em;letter-spacing:.03em;text-transform:uppercase}.mg-callout__label::before{margin-right:.45em;font-size:1.05em;vertical-align:-.06em}.mg-callout–info{background:#eff6ff;border-color:#bfdbfe;color:#1e3a5f}.mg-callout–info .mg-callout__label{color:#2563eb}.mg-callout–info .mg-callout__label::before{content:”2139FE0F”}.mg-callout–tip{background:#f0fdf4;border-color:#bbf7d0;color:#14532d}.mg-callout–tip .mg-callout__label{color:#15803d}.mg-callout–tip .mg-callout__label::before{content:”1F4A1″}.mg-callout–warning{background:#fffbeb;border-color:#fde68a;color:#7a4a10}.mg-callout–warning .mg-callout__label{color:#b45309}.mg-callout–warning .mg-callout__label::before{content:”26A0FE0F”}.mg-callout–danger{background:#fef2f2;border-color:#fecaca;color:#7f1d1d}.mg-callout–danger .mg-callout__label{color:#dc2626}.mg-callout–danger .mg-callout__label::before{content:”1F6D1″}.mg-proscons{display:grid;grid-template-columns:1fr 1fr;gap:16px;margin:1.5em 0}@media(max-width:560px){.mg-proscons{grid-template-columns:1fr}}.mg-proscons__col{padding:.9em 1.1em;border:1px solid;border-radius:10px}.mg-proscons__title{display:flex;align-items:center;gap:.4em;margin:0 0 .5em;font-weight:700;font-size:.9em;letter-spacing:.02em}.mg-proscons__col ul{margin:.3em 0 0;padding-left:1.15em}.mg-proscons__col li{margin:.3em 0;line-height:1.55}.mg-proscons__col–pro{background:#f0fdf4;border-color:#bbf7d0;color:#14532d}.mg-proscons__col–pro .mg-proscons__title{color:#15803d}.mg-proscons__col–pro .mg-proscons__title::before{content:”2705″}.mg-proscons__col–con{background:#fef2f2;border-color:#fecaca;color:#7f1d1d}.mg-proscons__col–con .mg-proscons__title{color:#dc2626}.mg-proscons__col–con .mg-proscons__title::before{content:”274C”}.mg-steps{list-style:none;counter-reset:mgstep;margin:1.5em 0;padding:0}.mg-steps__item{counter-increment:mgstep;position:relative;padding:0 0 1.1em 3.2em;min-height:2.4em}.mg-steps__item:last-child{padding-bottom:0}.mg-steps__item::before{content:counter(mgstep);position:absolute;left:0;top:0;width:2.2em;height:2.2em;line-height:2.2em;text-align:center;border-radius:50%;background:#2563eb;color:#fff;font-weight:700;font-size:.95em}.mg-steps__title{margin:.15em 0 .3em;font-weight:700}.mg-steps__item>:last-child{margin-bottom:0}.mg-kpis{display:grid;grid-template-columns:repeat(auto-fit,minmax(140px,1fr));gap:14px;margin:1.5em 0}.mg-kpi{padding:1em .9em;border:1px solid #e5e7eb;border-radius:12px;background:#f9fafb;text-align:center}.mg-kpi__value{display:block;font-size:1.7em;font-weight:800;line-height:1.15;color:#111827}.mg-kpi__label{display:block;margin-top:.35em;font-size:.85em;color:#6b7280;line-height:1.35}
.wp-block-image,.ai-image{margin-bottom:1.75em}.wp-block-image>figcaption,.ai-image>figcaption{margin-top:.5em}
Choosing home DIY tools is not about filling a toolbox with every available model. To assemble furniture, fix a shelf, cut a board, or repaint a room, a few reliable tools already cover a large part of common needs.
This guide offers a selection ordered by usefulness, then compares hand tools, power tools, and accessories according to the materials and the planned tasks. You will also find a progressive buying method, guidelines for buying or renting, maintenance tips, and the limits not to be crossed in electricity, gas, or on a load-bearing structure.
In brief
- 🔨 The basic foundation includes a hammer, screwdrivers, adjustable pliers, a tape measure, a spirit level, and a toolbox.
- ⚙️ The drill-driver becomes the first power tool purchase when you need to assemble, fix, or drill regularly.
- 🪚 The hand saw is enough to start; a jigsaw or circular saw is justified only depending on the planned cuts.
- 🛡️ Safety glasses, suitable gloves, hearing protection, and a mask should accompany work that generates splashes, noise, or dust.
- 💶 Buying progressively, renting, or borrowing infrequently used tools avoids over-equipping and ties up less budget.
How to identify your needs before buying DIY tools?
Start by listing the tasks planned over the next twelve months: repairs, furniture assembly, wall drilling, wood cutting, painting, or renovation. This step helps distinguish the tool that is truly necessary from the one that will only be used once.
The right equipment is the one that matches your materials, your frequency of use, and your skill level. A tenant hanging a few frames does not have the same needs as a homeowner renovating partitions or making furniture.
- For furniture and small repairs: hand tools, screwdrivers, wrenches, hammer, and drill-driver.
- For wood: hand saw, jigsaw, clamps, abrasives, and possibly a sander.
- For walls: tape measure, level, suitable drill, concrete bits, and anchors compatible with the support.
- For painting: spatulas, scrapers, sandpaper, rollers, brushes, and masking tape.
A versatile tool is only useful if it remains adapted to the material and the required precision.
#1 — Screwdrivers and hammer: the foundation of the toolbox
A hammer is used to drive nails, adjust a piece, dismantle an element, or reposition it. For the home, a carpenter’s hammer with a claw is a versatile choice; electrician’s, upholsterer’s models, or a mallet serve more specific uses.
Flat and Phillips screwdrivers are essential for screwing and unscrewing various elements. A set of different sizes is more practical than a single model, especially for small hardware screws, handles, furniture, and certain adjustments.
A set of manual screwdrivers remains necessary, even when an electric screwdriver is available. It allows precise intervention, avoids overtightening a small screw, and works in places where a powered tool cannot fit.
#2 — Tape measure and spirit level to avoid mistakes
Measuring before drilling or cutting limits rework and unnecessary material purchases. A 3-meter tape measure is suitable for starting; a 5-meter model offers more reach for rooms, furniture, and more varied domestic tasks.
The spirit level is used to check the horizontality and verticality of a shelf, frame, furniture, or rail. The laser measure can save time on certain measurements, but it is not essential for building a beginner’s toolbox.
Add a carpenter’s pencil, a ruler, or a square when you need to transfer a dimension or mark a cut. These inexpensive accessories prevent marking a material directly with an unsuitable tool.
#3 — Pliers and wrenches to hold, tighten, and loosen
The adjustable pliers allow you to tighten, hold, or loosen elements of different sizes. Needle-nose pliers make it easier to grip small parts and hold a wire, while cutting pliers are used to cut certain wires and materials designed for this purpose.
Also plan for some wrenches, including an adjustable wrench and Allen keys. They are useful for nuts, bolts, flat-pack furniture, faucets, and mechanical assemblies, but their size must match the fastener concerned.
Pliers should not replace a wrench when the faces of a nut risk being marked. To preserve the hardware, choose the tool that properly fits the shape of the piece instead of forcing with an approximate model.
#4 — Saws and cutting tools according to the material
The handsaw is the starting point for cutting wood. A hand saw is suitable for boards and battens, while a hacksaw is designed for metal parts equipped with an appropriate blade.
The jigsaw becomes interesting for making curved cuts, openings, or repeated cuts in panels. However, it requires a blade chosen according to the material and proper securing of the piece.
The circular saw is better suited for repetitive straight cuts in panels or boards, but it demands more skill and precautions. For occasional use, renting may be more sensible than buying.
A utility knife complements this equipment for cardboard, paper, drywall, or certain floor coverings. Its blade must be handled by directing the cutting path away from the body and stored immediately after use.
#5 — The drill-driver, the first power tool to choose
For common household tasks, a drill-driver allows screwing without fatigue and drilling with appropriate accessories. A variable speed control helps to start gradually, better control screwing, and adapt the action to the material.
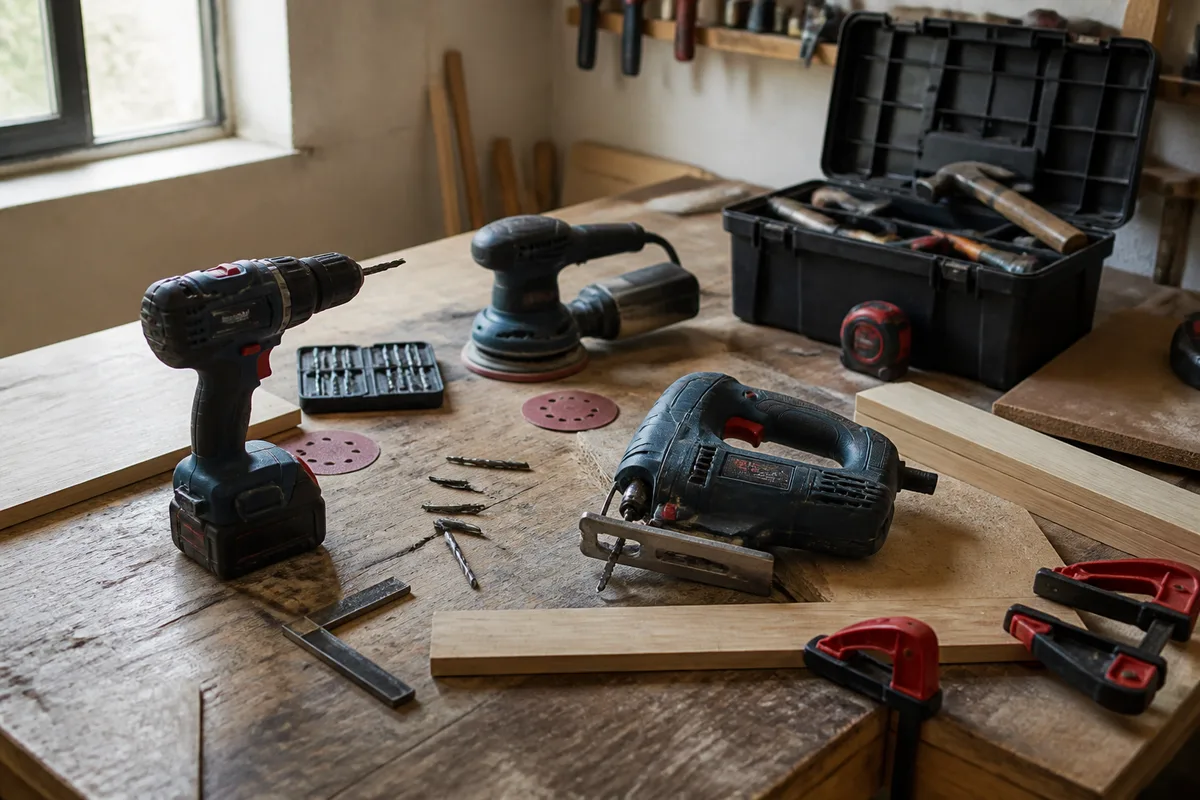
A cordless model offers great freedom of movement, especially for assembling furniture or working in a room without a nearby outlet. A corded version avoids battery management and can suit a fixed workstation, but its cable limits mobility.
Handling, weight, grip, and battery availability matter as much as the advertised power. If you choose a cordless platform, especially check if the batteries and charger are compatible with other tools in the same range.
Classic drill, hammer drill, or rotary hammer?
A classic drill is suitable for wood and metal with appropriate drill bits. The hammer function helps to work certain mineral materials, but it does not automatically turn the machine into a rotary hammer intended for heavy-duty work.
The rotary hammer is designed for masonry and more demanding drilling. It is better to rent it or call a professional when the support is difficult to identify, when drilling concerns a sensitive area, or when the tool is too powerful for your experience.
What accessories to plan with a drill-driver?
Accessories must be chosen according to the support. A wood drill bit, a metal drill bit, and a masonry drill bit are not interchangeable, as their geometry and use differ.
- Flat, Phillips, and other bit profiles matching the screws used.
- Wood drill bits for wooden parts and panels.
- Metal drill bits for metals compatible with the intended diameter.
- Masonry drill bits or bits for mineral walls, with prior verification of the support.
- Anchors adapted to the nature of the wall and the load to be fixed.
For a partition made of plasterboard, the choice of fixing is as important as that of the drill bit. Consult our guide on the correct size of Molly anchor for BA13 before fixing a significant load.
The drill bit diameter, the type of anchor, and the nature of the wall must be considered as a single unit.
#6 — Useful power tools to go further
Once the basic work is covered, power tools are chosen according to the frequency of projects. Buying a jigsaw, a sander, or an angle grinder just because it is included in a complete kit is not necessarily rational.
For cutting wood and panels
The jigsaw is suitable for cutting panels and curved shapes, with a blade chosen according to the material and the desired finish. The circular saw is more efficient for long straight cuts, provided the machine is properly guided and the piece is held securely.
For sanding and preparing surfaces
A sander can speed up the preparation of wood, old paint, or a surface to be renovated. Abrasives must be selected according to the material and the level of finish; sanding produces dust that justifies respiratory protection and appropriate extraction.
For targeted work on a metal piece, technique and abrasive are decisive. The advice dedicated to the tool for sanding metal helps distinguish the needs for preparation and finishing.
For finishing and painting
Spatulas and scrapers are used to remove flaking paint or to apply wood filler and putty. Rollers, brushes, and masking tapes complete the necessary equipment to repaint a room neatly.
A headlamp or a portable work light is useful in a cellar, a closet, or a poorly lit attic. It frees the hands but does not exempt from cutting the power supply of equipment before any intervention that presents an electrical risk.
#7 — Clamps and the toolbox for working cleanly
Clamps firmly hold pieces during assembly, gluing, or cutting. They improve precision and avoid holding a piece by hand too close to a blade or a moving tool.
The toolbox must protect the equipment, facilitate transport, and allow quick access to accessories. For small equipment, a compartmentalized box is sufficient; for regular use, separate organizers for screws, anchors, bits, and consumables become more practical.
Store tools clean, dry, and separate from consumables that can damage them. Blades, drill bits, and bits must be protected to preserve their sharpness and reduce the risk of cuts when searching for an accessory.
How to choose between manual and electric tools?
Manual tools are silent, immediately available, and suitable for small interventions. Electric tools speed up repetitive tasks or tougher materials but add weight, noise, batteries, consumables, and safety rules.
| Solution | Advantages | Limitations | Best suited for |
|---|---|---|---|
| Manual tool | Simple, precise, no battery or cable | Slower for repetitive tasks | Small repairs and finishing |
| Cordless tool | Mobile and practical throughout the house | Battery life, charging, and battery management | Assembly, screwing, and frequent interventions |
| Wired tool | No recharging during use | Cable and access to a power outlet required | Fixed workstation or prolonged use |
| Rental | Occasional access to specialized machines | Availability and rental duration to anticipate | Occasional major work |
For domestic use, the most balanced choice often consists of starting with manual tools, then adding a drill-driver. A saw, a sander, or a rotary hammer can then be bought, rented, or borrowed depending on the project.
Which tools to use according to the type of work?
The material and the task determine the relevant tool. A saw intended for wood, a masonry drill bit, and an abrasive for metal do not meet the same needs, even if they can be grouped in the category of DIY equipment.
Assembling furniture and performing small repairs
Plan to have screwdrivers, Allen keys, hammer, pliers, tape measure, and spirit level. A drill-driver makes repeated assemblies easier, but the final tightening of a small fastener may require more control with a manual screwdriver.
Working with wood
A handsaw is sufficient for a few cuts, while a jigsaw is suitable for panels and curved cuts. Add clamps, a pencil, a square, sandpaper, and a sander if there are many surfaces to prepare.
Attaching elements to walls
A tape measure, a level, an appropriate drill, and compatible wall plugs are necessary. Before drilling, identify the nature of the wall as much as possible and avoid areas where networks may run.
Renovating and painting
Spatulas, scrapers, abrasives, tarps, masking tapes, brushes, and rollers form the basics. For floor renovation, cutting the covering requires an appropriate cutter and a stable work surface; laying linoleum then requires equipment suitable for preparation and finishing.
How to buy sustainable DIY equipment?
Do not only compare the displayed price. Examine the grip, the sturdiness of moving parts, the availability of consumables, the ease of replacing a blade or bit, and the clarity of the warranty.
For a powered tool, raw power alone is not enough to predict user comfort. A device that is too heavy tires quickly, while a model poorly suited to the material can produce an imprecise cut or excessively strain the motor.
- If possible, test the balance and access to controls.
- Check that common accessories are available separately.
- Compare the actual contents of a case rather than just the number of pieces.
- Check warranty conditions and the availability of wear parts.
- Avoid kits that multiply accessories of uncertain quality.
Should you buy, rent, or borrow your tools?
Buying is suitable for tools used regularly, such as a hammer, screwdriver, tape measure, or drill-driver. Renting is often more logical for a rotary hammer, circular saw, or sander that will only be used on a one-off job site.
Borrowing can reduce the budget but requires checking the condition of the machine, the presence of accessories, and usage instructions before starting. Do not take a tool you do not know how to handle for an operation presenting significant risk.
Buying gradually allows prioritizing quality and avoiding a collection of tools rarely used.
What protections should you use to DIY safely?
Protective equipment depends on the job. Glasses protect against splashes, a mask limits dust exposure, hearing protection reduces noise discomfort, and suitable shoes protect feet against falling objects.
Gloves are not suitable for all operations, especially near a rotating tool or a moving blade. Consult the manufacturer’s instructions and the prevention recommendations of the National Institute for Research and Safety (INRS) to choose protection consistent with the risk.
Do not carry out work yourself on a gas installation, a load-bearing structure, or an electrical circuit if you do not master the applicable rules. Cutting off power is not enough to make an installation safe, and a mistake can cause electrocution, fire, leaks, or structural weakening of the building.
What mistakes should be avoided when equipping yourself for DIY?
Purchase mistakes are often related to a poor definition of the job rather than a lack of tools. Correcting them from the start allows working more safely and limiting unnecessary expenses.
- Buying a too complete kit without checking its contents: the number of pieces does not guarantee their compatibility or durability. Compare the tools actually included and the accessories you will need.
- Using the wrong drill bit or blade: the tool can overheat, break, or damage the material. Identify the material before choosing the accessory.
- Forcing with an inappropriate tool: pliers can mark a nut and a screwdriver that is too small can damage the screw head. Use the right size.
- Neglecting to secure the piece: a moving board makes the cut imprecise and increases the risk of injury. Use clamps and a stable support.
- Starting a risky job without diagnosis: drilling a wall or modifying an installation can affect a network or structure. Stop and call a professional when in doubt.
Which toolbox to choose according to your profile?
The beginner’s minimal equipment
The beginner can start with a hammer, a set of screwdrivers, adjustable pliers, a wrench, a tape measure, a spirit level, a cutter, some fastening accessories, and a sturdy box. This base covers assembly, adjustments, and small repairs.
The regular DIYer’s equipment
Add a drill-driver, several suitable drill bits, bits, clamps, a handsaw, and protective equipment. A work lamp, a box for screws, and spare consumables also improve organization.
The experienced DIYer’s equipment
The regular DIYer can complete their equipment with a jigsaw, a sander, or a circular saw depending on their projects. More specialized tools should be chosen after identifying actual use, storage space, and necessary safety conditions.
How to maintain your tools to keep them longer?
Clean tools after each job, remove dust, and immediately dry metal parts exposed to moisture. Blades and drill bits should be stored in a case or compartment to avoid shocks and cuts.
Regularly inspect cables, batteries, casings, handles, and safety devices. A tool with a damaged cable, swollen battery, deformed blade, or faulty switch should not be used before repair or replacement.
Store batteries according to the manufacturer’s instructions and do not leave a device plugged in unattended. The actual lifespan depends on usage frequency, storage conditions, and adherence to the limits set for each tool.
What budget to plan to build a toolbox?
The budget depends on the quality level, the number of manual tools, and the presence of a drill-driver or specialized accessories. As a purely indicative guide, a manual base can represent a few dozen euros, while an expanded set with power tools and protection can reach several hundred euros.
These amounts do not constitute an official price: prices vary according to brands, promotions, quality, kit contents, and the presence of a battery or charger. To reduce expenses, first buy the tools you will use immediately and rent exceptional machines.
A simple method is to spread purchases over three stages:
- Build the manual base and protections.
- Add the drill-driver and accessories related to planned work.
- Acquire or rent cutting, sanding, or masonry machines at the time of the job.
Key takeaways
- 🔧 Start with the most versatile manual tools before specialized machines.
- 📏 Measure and check each fastening with a tape measure and spirit level.
- 🪵 Choose drill bits, blades, and abrasives according to the material actually worked on.
- 💡 Rent expensive or infrequently used tools rather than over-equipping your box.
- ⚠️ Call a professional for gas, electricity, structure, and poorly identified situations.
Frequently Asked Questions
What are the truly essential tools to have at home?
The essentials generally include a hammer, flathead and Phillips screwdrivers, an adjustable pliers, a wrench, a tape measure, a spirit level, a utility knife, and a toolbox. A drill-driver usefully complements this base when fastening tasks become regular.
What is the difference between a drill and a rotary hammer?
A drill is suitable especially for wood and metal with the appropriate drill bits, while a rotary hammer is intended for more demanding work in masonry. The choice depends on the material, the hole diameter, and the frequency of the job.
Should cordless tools be preferred?
Cordless tools are convenient for moving around and working without an extension cord, but you need to manage charging, battery life, and battery compatibility. For fixed or prolonged use, a corded tool may be more suitable.
How to choose the right drill bits and blades?
First identify the material: wood, metal, masonry, or covering. Then choose an accessory whose diameter and function correspond to the operation, and check the tool manufacturer’s recommendations.
Which tasks require the intervention of a professional?
Work involving gas, electrical circuits, load-bearing structures, and certain hazardous equipment requires specific skills and precautions. Also call a professional if you cannot identify the support, network, or risk before starting.
Useful sources to consult
INRS provides prevention resources on risks related to tools, dust, noise, and protective equipment. For work involving building or installations, supplement this information with the manufacturer’s instructions and the technical rules applicable to your situation.
.magic-lb-overlay{position:fixed;inset:0;background:rgba(15,23,42,.92);display:none;align-items:center;justify-content:center;z-index:99999;cursor:zoom-out;padding:20px}
.magic-lb-overlay.open{display:flex}
.magic-lb-overlay img{max-width:95vw;max-height:95vh;object-fit:contain;border-radius:8px;box-shadow:0 8px 32px rgba(0,0,0,.5)}
.magic-lb-close{position:absolute;top:16px;right:20px;color:#fff;background:rgba(0,0,0,.5);border:none;width:40px;height:40px;border-radius:50%;font-size:24px;cursor:pointer;display:flex;align-items:center;justify-content:center}
.magic-lb-close:hover{background:rgba(0,0,0,.8)}
.wp-block-image img{cursor:zoom-in;transition:transform .15s ease}
.wp-block-image img:hover{transform:scale(1.01)}
.magic-img-link{display:inline-block;text-decoration:none}
(function(){
var ov=document.getElementById(‘magic-lb’);if(!ov)return;
var img=ov.querySelector(‘img’),btn=ov.querySelector(‘.magic-lb-close’);
function open(src){img.src=src;ov.classList.add(‘open’);document.body.style.overflow=’hidden’}
function close(){ov.classList.remove(‘open’);img.src=”;document.body.style.overflow=”}
document.addEventListener(‘click’,function(e){
var a=e.target.closest(‘a.magic-img-link’);
if(a){e.preventDefault();open(a.getAttribute(‘href’));return}
var i=e.target.closest(‘.wp-block-image img’);
if(i&&!e.target.closest(‘a’)){e.preventDefault();open(i.currentSrc||i.src)}
});
ov.addEventListener(‘click’,function(e){if(e.target===ov||e.target===btn)close()});
document.addEventListener(‘keydown’,function(e){if(e.key===’Escape’)close()});
})();