.en-bref { max-width: 640px; margin: 2em auto; padding: 1.5em 1.8em; color: #78350f; font-family: “Inter”, “Segoe UI”, sans-serif; text-align: left; position: relative; box-sizing: border-box; background: #fffaf0; border: 1px solid #b45309; border-left: 6px solid #b45309; border-radius: 8px; box-shadow: 0 8px 24px rgba(251, 191, 36, 0.15); }
.en-bref h2, .en-bref .en-bref-header { font-size: 1.15em; font-weight: 700; margin-bottom: 0.6em; color: #b45309; }
.en-bref p, .en-bref li { font-size: 1em; line-height: 1.65; margin: 10px; }
.en-bref strong { color: #451a03; }
.key-takeaways { max-width: 640px; margin: 2em auto; padding: 1.5em 1.8em; color: #78350f; font-family: “Inter”, “Segoe UI”, sans-serif; text-align: left; position: relative; box-sizing: border-box; background: #fffaf0; border: 1px solid #b45309; border-left: 6px solid #b45309; border-radius: 8px; box-shadow: 0 8px 24px rgba(251, 191, 36, 0.15); }
.key-takeaways h2, .key-takeaways .key-takeaways-header { font-size: 1.15em; font-weight: 700; margin-bottom: 0.6em; color: #b45309; }
.key-takeaways p, .key-takeaways li { font-size: 1em; line-height: 1.65; margin: 10px; }
.key-takeaways strong { color: #451a03; }
.key-takeaways ul { list-style: none; padding-left: 0; }
.key-takeaways li { margin: 0.45em 0; padding-left: 0.2em; }
.mg-callout{margin:1.5em 0;padding:.9em 1.1em;border:1px solid;border-left-width:4px;border-radius:10px;font-size:.97em;line-height:1.65}.mg-callout>:first-child{margin-top:0}.mg-callout>:last-child{margin-bottom:0}.mg-callout__label{display:block;margin:0 0 .35em;font-weight:700;font-size:.82em;letter-spacing:.03em;text-transform:uppercase}.mg-callout__label::before{margin-right:.45em;font-size:1.05em;vertical-align:-.06em}.mg-callout–info{background:#eff6ff;border-color:#bfdbfe;color:#1e3a5f}.mg-callout–info .mg-callout__label{color:#2563eb}.mg-callout–info .mg-callout__label::before{content:”2139FE0F”}.mg-callout–tip{background:#f0fdf4;border-color:#bbf7d0;color:#14532d}.mg-callout–tip .mg-callout__label{color:#15803d}.mg-callout–tip .mg-callout__label::before{content:”1F4A1″}.mg-callout–warning{background:#fffbeb;border-color:#fde68a;color:#7a4a10}.mg-callout–warning .mg-callout__label{color:#b45309}.mg-callout–warning .mg-callout__label::before{content:”26A0FE0F”}.mg-callout–danger{background:#fef2f2;border-color:#fecaca;color:#7f1d1d}.mg-callout–danger .mg-callout__label{color:#dc2626}.mg-callout–danger .mg-callout__label::before{content:”1F6D1″}.mg-proscons{display:grid;grid-template-columns:1fr 1fr;gap:16px;margin:1.5em 0}@media(max-width:560px){.mg-proscons{grid-template-columns:1fr}}.mg-proscons__col{padding:.9em 1.1em;border:1px solid;border-radius:10px}.mg-proscons__title{display:flex;align-items:center;gap:.4em;margin:0 0 .5em;font-weight:700;font-size:.9em;letter-spacing:.02em}.mg-proscons__col ul{margin:.3em 0 0;padding-left:1.15em}.mg-proscons__col li{margin:.3em 0;line-height:1.55}.mg-proscons__col–pro{background:#f0fdf4;border-color:#bbf7d0;color:#14532d}.mg-proscons__col–pro .mg-proscons__title{color:#15803d}.mg-proscons__col–pro .mg-proscons__title::before{content:”2705″}.mg-proscons__col–con{background:#fef2f2;border-color:#fecaca;color:#7f1d1d}.mg-proscons__col–con .mg-proscons__title{color:#dc2626}.mg-proscons__col–con .mg-proscons__title::before{content:”274C”}.mg-steps{list-style:none;counter-reset:mgstep;margin:1.5em 0;padding:0}.mg-steps__item{counter-increment:mgstep;position:relative;padding:0 0 1.1em 3.2em;min-height:2.4em}.mg-steps__item:last-child{padding-bottom:0}.mg-steps__item::before{content:counter(mgstep);position:absolute;left:0;top:0;width:2.2em;height:2.2em;line-height:2.2em;text-align:center;border-radius:50%;background:#2563eb;color:#fff;font-weight:700;font-size:.95em}.mg-steps__title{margin:.15em 0 .3em;font-weight:700}.mg-steps__item>:last-child{margin-bottom:0}.mg-kpis{display:grid;grid-template-columns:repeat(auto-fit,minmax(140px,1fr));gap:14px;margin:1.5em 0}.mg-kpi{padding:1em .9em;border:1px solid #e5e7eb;border-radius:12px;background:#f9fafb;text-align:center}.mg-kpi__value{display:block;font-size:1.7em;font-weight:800;line-height:1.15;color:#111827}.mg-kpi__label{display:block;margin-top:.35em;font-size:.85em;color:#6b7280;line-height:1.35}
.wp-block-image,.ai-image{margin-bottom:1.75em}.wp-block-image>figcaption,.ai-image>figcaption{margin-top:.5em}
Order of work for a house before moving in: the ideal schedule
The order of work for a house directly determines the duration of the construction site, the final budget, and the quality of the finishes. To avoid repainting a wall that still needs to be drilled, laying flooring before a dry screed, or installing a kitchen in a dusty room, interventions must be organized according to their technical dependencies.
This guide follows the chronology of a renovation, from diagnosis to final cleaning. You will find the priority steps, the work to entrust to a professional, an indicative planning table, common mistakes, and the conditions to meet before moving in.
In brief
- 🧱 The general order follows four main phases: preparation, structural work, secondary work, and finishing.
- 🔧 Water, electricity, and gas networks come before insulation, partitions, and coverings.
- ⏳ Deadlines vary depending on surface area, permits, craftsmen, deliveries, and drying times.
- 🏠 Moving in becomes reasonable when dusty, dangerous, and fume-generating work is completed.
Why respect a precise order before moving in?
The principle is simple: start with the work that modifies the building, continue with the networks, and finish with the visible elements. Demolition generally precedes structural work, then come technical installations, insulation, coatings, screed, and coverings. This logic limits rework and protects the work already done.
However, a construction site can deviate from this sequence when the house presents a particular urgency. An infiltration, a structural risk, a defective gas installation, or significant humidity takes precedence over comfort work. In an old house, structural and humidity problems must notably be treated before decorative finishes.
A new covering never fixes a roofing, structural, or humidity problem: it only risks temporarily masking it.
The schedule must therefore be built around three questions: which work must be completed before the next, what drying time must be respected, and which craftsman must intervene before closing walls or ceilings? This method is more reliable than a simple task list.
What to start the work of a house with?
Start with a technical assessment, then classify the work according to their urgency and impact on the rest of the site. Before choosing a paint or flooring, check the structure, roof, humidity, joinery, networks, and energy performance. The detailed schedule comes only after this analysis.
Check the general condition of the building
Inspect walls, ceilings, floors, attics, roof, facades, and damp rooms. Look for evolving cracks, infiltration traces, mold, rising damp, degraded wood, and areas where the ground seems unstable. A visual observation does not replace the opinion of a professional when a disorder seems significant.
Also note constraints that can modify the renovation order: load-bearing walls, available ceiling height, site access, presence of asbestos or lead, debris removal, and temporary maintenance of water or electricity.
Carry out the necessary diagnostics and checks
Useful diagnostics depend on the building’s age, the nature of the work, and the housing situation. For an energy renovation, analyzing the energy status allows prioritizing interventions rather than adding isolated works. ADEME recommends knowing the state of the housing well before defining renovation priorities.
For a structural modification, an opening in a load-bearing wall, foundation repair, roofing, or gas intervention, request an appropriate evaluation. Applicable rules, urban planning permits, and mandatory checks should be confirmed with the town hall, a diagnostician, or a qualified professional.
Establish a realistic budget and schedule
Prepare a table including the work, supplies, labor, rental fees, waste disposal, deliveries, and a reserve for unforeseen events. In a renovation, discovering a degraded support behind a partition or under a covering can modify the initial budget.
As a guideline, a range of €1,500 to €2,500 per square meter has been published for the renovation of an old house in France, depending on the extent of the work. This reference, dated 2021, is not a 2026 rate: location, condition of the building, materials, fees, and technical constraints can cause significant variation. Have several detailed quotes drawn up and verify the amounts with professionals.
| Phase | Objective | What must be completed before proceeding | Indicative duration |
|---|---|---|---|
| Diagnosis and preparation | Define priorities and secure the site | Project, budget, authorizations, and access validated | From a few days to several weeks |
| Demolition and structural work | Modify or restore the building | Structure, roof, and waterproofing checked | Variable depending on findings |
| Networks and insulation | Install invisible equipment | Network tests and supports ready | From a few days to several weeks |
| Finishing work | Close, plaster, and level surfaces | Partitions, ceilings, plasters, and screed completed | Variable, with drying times |
| Finishes and inspection | Install equipment, clean, and accept work | Identified reservations and secured dwelling | From one to several weeks |
How to prepare the site before the first demolition?
Prepare the site before the craftsmen arrive by emptying the rooms, protecting the areas to be preserved, and organizing access to materials. This step reduces damage and speeds up interventions. It should also specify who removes the rubble, where to store supplies, and how to maintain essential networks.
Step 1: empty, protect, and secure spaces
Remove furniture, textiles, and fragile objects. Protect preserved elements with suitable tarps, mark hazardous areas, and provide ventilation when the products used require it. Children and animals must not access demolition zones, tools, or temporary installations.
Before removing a partition, ceiling, or old equipment, check for the absence of pipes and cables in the area. Demolition must not start on mere assumption, especially in an old building.
Step 2: plan interventions and deliveries
Create a shared schedule with the craftsmen. Enter the expected dates, dependencies, deliveries, inspections, and drying times. The mason, plumber, electrician, drywall installer, painter, and floor layer cannot work independently of each other.
- Confirm plans and dimensions before any order.
- Reserve materials with long delivery times.
- Provide a dry and accessible storage area.
- Define the procedure for removing rubble and packaging.
- Organize a checkpoint before closing walls or ceilings.
A useful schedule does not only indicate a date: it specifies the condition that authorizes the start of the next intervention.
What is the order of renovation work for a house?
The most common sequence is as follows: demolition, structural work, roofing and waterproofing, exterior joinery, networks, insulation, partitions, plasters, screed, coverings, equipment, cleaning, and final inspection. This order remains a working framework: the actual condition of the building may require adaptation or priority intervention.
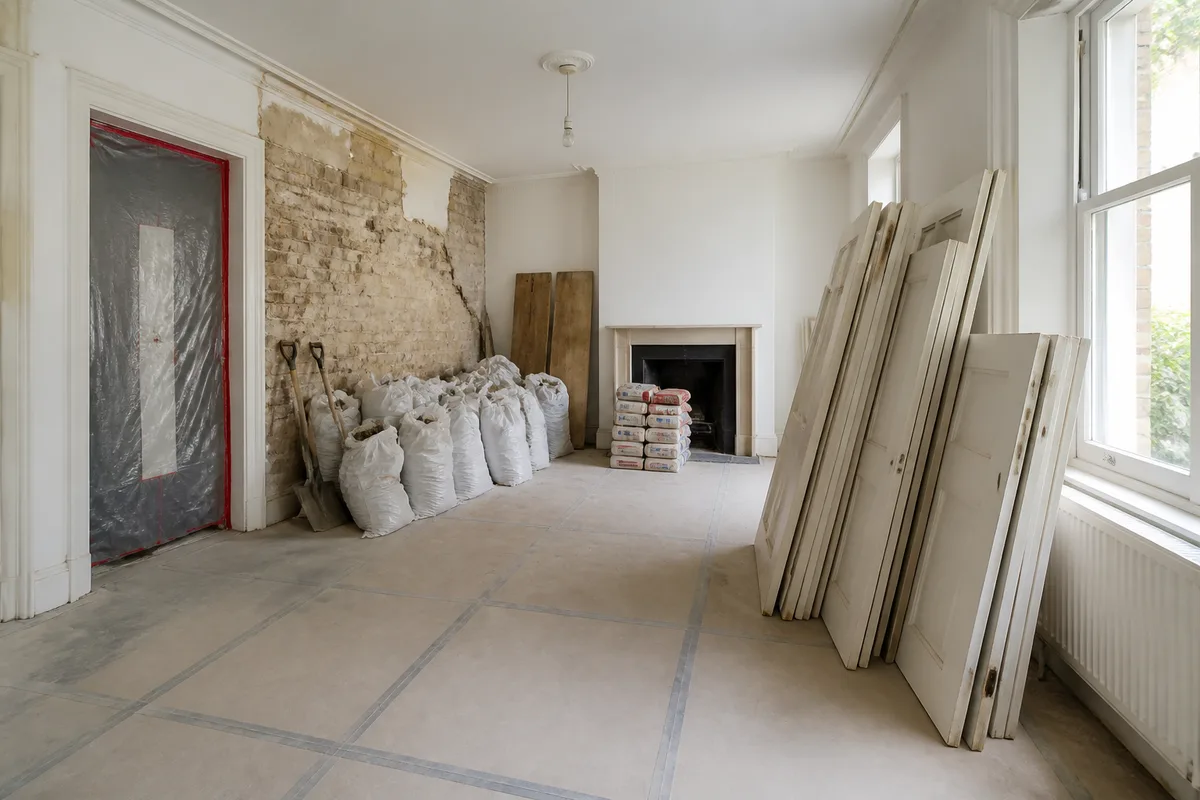
Step 3: demolish the elements to be removed
Remove partitions, old coverings, sanitary equipment, interior doors, and unnecessary elements before rebuilding. Demolition sometimes reveals unmarked networks, fragile supports, or moisture problems. Sort materials that can be reused and separate waste according to the designated channels.
Do not remove a load-bearing wall, a beam, a framework element, or a duct without technical validation. Structural demolition can compromise the building’s stability and requires the intervention of a competent professional.
Step 4: address the structural work, roofing, and waterproofing
Repair or replace the elements that ensure the stability and protection of the house: foundations, load-bearing walls, floors, beams, framework, roofing, facades, and waterproofing works. A facade may need to be treated before interior finishes to prevent infiltration or splashes from damaging new surfaces.
In an old house, moisture deserves special attention. Sanitize the walls and damp rooms before installing insulation, lining, or paint. A still damp surface can cause bubbles, odors, mold, or peeling of coverings.
Step 5: replace windows and exterior joinery
Windows and exterior doors are generally installed before interior finishes. This work can produce dust and requires reworking the reveals, sills, and waterproofing joints. Check the dimensions, opening direction, and compatibility with the planned insulation.
Poorly coordinated installation can create a thermal bridge, that is, an area where heat escapes more, or allow water and air to pass through. The connection between the joinery, the wall, and the insulation must be treated according to the building’s configuration.
Step 6: carry out insulation and prepare for energy renovation
Insulation of walls, attics, and floors takes place after work that might damage the surfaces but before closing with plasterboard. Its exact location depends on the chosen technique: interior insulation, exterior insulation, roofing, or underfloor.
Heating and ventilation must be planned alongside insulation. A better-sealed house requires appropriate ventilation to limit condensation and renew the air. For energy works that may qualify for aid, check the conditions in effect in 2026 on France Rénov’ and with official organizations before signing.
Step 7: redo water, electricity, and gas networks
Create passages, then install ducts, pipes, and drains before closing the partitions. Plumbing and electrical networks must be positioned according to future appliances: outlets, lighting, radiators, sink, washing machine, shower, water heater, and kitchen equipment.
Plumbing is sometimes installed before electricity when managing crossings of pipes and cables, but this sequence depends on the site configuration. The key point is to validate the plans and carry out tests before insulation and drywall.
Electrical, gas installations, and major plumbing modifications must be entrusted to qualified professionals when skills, controls, or building safety require it. Do not put an installation back into service without appropriate verification.
For the bathroom, first position the supply and drainage, then plan the appropriate waterproofing before installing equipment. Implementation constraints are detailed in this guide dedicated to installing a walk-in shower.
Step 8: install partitions, ceilings, and interior joinery
When networks and insulation are checked, close the walls and ceilings. Install partitions, panels, frames, and door blocks according to the plans. This phase defines the final volumes of the rooms: therefore, check the dimensions of the kitchen, sanitary facilities, closets, and passages before continuing.
Photograph the networks before closing them and keep the plans. These documents will be useful for drilling a wall, adding an outlet, or working on a pipe several years later.
Step 9: prepare walls, ceilings, and floors
Carry out plastering, jointing, smoothing, and surface repairs after installing networks and insulation. Walls and ceilings must be sufficiently flat, clean, and dry before painting or applying a covering.
The screed comes next when the floor needs to be leveled or to receive an integrated network. Respect its drying time before laying parquet, a flexible floor, or tiles. This delay depends notably on the thickness, ventilation, temperature, and the product used.
Step 10: Lay coverings and complete the finishes
Coverings constitute the last major phase of the interior work. Protect the surfaces already finished and coordinate interventions to avoid scratches, stains, and splashes. Painting is often done before laying fragile floors, although some adjustments are necessary depending on the material.
A flexible floor like linoleum requires a clean, dry, and even support. Consult the recommendations for laying linoleum before ordering rolls or tiles, especially to anticipate floor preparation and joints.
Then install the fixed equipment in the kitchen and bathroom. For a backsplash, the choice of material influences the installation, cutting, and maintenance; a comparison of kitchen backsplashes can help verify compatibility with the countertop and water splashes.
How to coordinate craftsmen and avoid rework?
Coordinate the craftsmen using a single plan and intermediate validation points. The professional intervening must know the final dimensions, the routes of networks, and the work already completed. Before each phase change, check the supports, levels, tests, and necessary reservations.
An architect or project manager can be useful for a complete renovation, especially when several trades intervene simultaneously. For a more limited project, the owner can follow the schedule themselves, provided they have precise plans and time to check the work.
- Validate the plans of the rooms, networks, and equipment.
- Confirm the supports before the next craftsman’s intervention.
- Test the networks before closing partitions or ceilings.
- Respect the drying times indicated by the manufacturers.
- Photograph the invisible works and archive the manuals.
- Record the reservations before final payment or acceptance.
The best savings often consist of checking a step before covering it, rather than repairing after closing a wall.
Which works can wait until after moving in?
Works that can wait are those that do not compromise safety, waterproofing, or the daily functioning of the house. Temporary decoration, a secondary dressing room, or the fitting out of a rarely used room can be postponed. On the other hand, a leak, a dangerous electrical installation, or unusable heating does not fall into this category.
- Decorative painting of a rarely used room.
- Installation of non-essential storage.
- Landscaping and planting.
- Replacement of a decorative light fixture that is functionally secondary.
- Aesthetic finishes that do not produce significant dust or fumes.
Postponing an expense does not mean leaving a risk in place. A temporarily protected roof, active humidity, or a missing guardrail must be addressed before installation, even if decoration can wait.
What are common mistakes in the order of works?
The most costly mistakes are often coordination errors, not choices of color or material. They appear when a task is started without checking what must go behind, underneath, or above. Avoiding them mainly requires simple checks done at the right time.
Lay floors before dirty work
Parquet or a flexible floor laid too early risks being scratched, stained, or warped by moisture. Wait until the dusty work, plastering, and heavy interventions are finished. If a floor must absolutely be preserved, protect it with an appropriate system and regularly check its condition.
Close walls without testing networks
A leak or a misplaced cable becomes much harder to fix after plasterboard installation. Perform tests, photograph the passages, and check the outlets before closing. This precaution also concerns drains, kitchen connections, and sanitary hookups.
Painting before fixing moisture issues
Paint does not treat infiltration or rising damp. It can even delay the identification of the problem by temporarily masking the stains. First determine the source of the moisture, dry the surface, and only proceed to finishing after the issue has been resolved.
Ordering equipment without checking dimensions
A kitchen, bathtub, door, or vanity unit can become incompatible with a partition moved by a few centimeters. Take measurements after structural work and before placing the final order. Also check the water inlets, drains, sockets, and necessary clearances.
Moving in during hazardous or polluting work
Demolition dust, solvents, adhesives, varnishes, and certain treatments require ventilation and drying time. Do not install occupants in an area where work still poses respiratory, electrical, mechanical, or fall risks. If in doubt, seek the opinion of the professional who carried out the work.
What schedule to plan before moving in?
A home renovation schedule cannot provide a universal duration. A light renovation may focus on a few weeks, while a complete renovation or a very degraded old house can extend over several months. Delivery times, permits, company availability, and site discoveries are decisive.
Example schedule for a light renovation
In a habitable house where the structure, roof, and networks are preserved, the work can follow this sequence: preparation, removal of old coverings, wall repairs, targeted work in the kitchen or bathroom, painting, flooring, equipment, and cleaning. The actual duration should be confirmed according to the surface area and number of craftsmen.
Example schedule for a complete renovation
For a complete renovation, plan successively the diagnostics and studies, demolition, structural work, roofing or exterior joinery, networks, insulation, partitions, coatings, screed, coverings, equipment, and final acceptance. A heavy transformation, such as converting a barn into a dwelling, can reach an order of magnitude of about twelve months, but this figure strongly depends on the project and does not constitute a guaranteed deadline.
Add a margin for drying times and contingencies. The work should not be scheduled up to the exact day of moving in: allow a buffer period for touch-ups, delivery of missing elements, cleaning, and inspections.
How to know if the house is ready for moving in?
Moving in is reasonable when the house is safe, dry, clean, and functional. Dusty, noisy, or fume-generating work must be completed in the occupied rooms. Essential networks must be tested, access secured, and major defects addressed or clearly noted.
Perform final cleaning of the site
Start by vacuuming fine dust, clean horizontal surfaces, wash windows, and dust ventilation grilles. Remove protections, packaging, material scraps, and products stored in living areas. Some glue, cement, or paint residues require a product compatible with the surface.
Dispose of waste through appropriate channels. Rubble, packaging, wood, metals, electrical waste, and chemicals must not be mixed without checking local disposal rules. Reuse can be considered for doors, sanitary ware, radiators, or materials still in good condition, provided their safety and compatibility are verified.
Carry out checks before installation
- Test water, drains, taps, and check for leaks.
- Have the electrical installation checked according to the nature of the work done.
- Check heating, ventilation, and necessary detectors.
- Verify windows, doors, locks, stairs, and guardrails.
- Look for moisture traces, paint defects, and poorly cleaned areas.
- Gather manuals, invoices, certificates, and network plans.
Write a list of defects with photographs and dates. For work carried out by a company, acceptance and applicable guarantees must be documented. The exact terms depend on the contract and the nature of the intervention.
Key Takeaways
- 🧱 Start by diagnosing, demolishing, and addressing structural or moisture issues.
- 🔌 Install networks before insulation, partitions, and coverings.
- 🎨 Keep paints, floors, and visible equipment for the end of the project.
- 🧹 Clean, ventilate, and inspect the house before moving furniture.
- 🛠️ Entrust the structure, gas, roofing, waterproofing, and electrical work to qualified professionals.
Frequently Asked Questions
Should you start with electricity or plumbing?
Both networks should be planned together, as they must coexist within walls and ceilings. Plumbing can be installed before electricity in certain configurations, but the choice depends on crossings, drains, and approved plans.
When should the parquet or other floor covering be installed?
The floor is installed after dusty work, plastering, screeding, and respecting drying times. The substrate must be clean, dry, flat, and compatible with the chosen covering.
Can you move in before the work is finished?
It is sometimes possible if the living areas are separated from the construction site and water, electricity, heating, access, and ventilation are safe. Moving in during work that generates dust, fumes, significant noise, or risk of falling is not recommended.
Which work is a priority in an old house?
First address issues related to the structure, roofing, waterproofing, and moisture. Dangerous or faulty networks must also be checked before insulation and finishing.
How long should you wait before moving in?
You must wait until dirty work is finished and plaster, screeds, paints, adhesives, and varnishes have dried according to manufacturers’ instructions. The overall duration varies by project; allow extra time for touch-ups and final cleaning.
Useful Sources to Consult
- ADEME: energy status of the home and renovation principles.
- France Rénov’: aid and support to verify according to rules in force in 2026.
- Service-Public.fr: authorizations, obligations, and administrative procedures.
- Indicative cost benchmark: published range for renovating an old house, 2021 data to be updated by quotes.
.magic-lb-overlay{position:fixed;inset:0;background:rgba(15,23,42,.92);display:none;align-items:center;justify-content:center;z-index:99999;cursor:zoom-out;padding:20px}
.magic-lb-overlay.open{display:flex}
.magic-lb-overlay img{max-width:95vw;max-height:95vh;object-fit:contain;border-radius:8px;box-shadow:0 8px 32px rgba(0,0,0,.5)}
.magic-lb-close{position:absolute;top:16px;right:20px;color:#fff;background:rgba(0,0,0,.5);border:none;width:40px;height:40px;border-radius:50%;font-size:24px;cursor:pointer;display:flex;align-items:center;justify-content:center}
.magic-lb-close:hover{background:rgba(0,0,0,.8)}
.wp-block-image img{cursor:zoom-in;transition:transform .15s ease}
.wp-block-image img:hover{transform:scale(1.01)}
.magic-img-link{display:inline-block;text-decoration:none}
(function(){
var ov=document.getElementById(‘magic-lb’);if(!ov)return;
var img=ov.querySelector(‘img’),btn=ov.querySelector(‘.magic-lb-close’);
function open(src){img.src=src;ov.classList.add(‘open’);document.body.style.overflow=’hidden’}
function close(){ov.classList.remove(‘open’);img.src=”;document.body.style.overflow=”}
document.addEventListener(‘click’,function(e){
var a=e.target.closest(‘a.magic-img-link’);
if(a){e.preventDefault();open(a.getAttribute(‘href’));return}
var i=e.target.closest(‘.wp-block-image img’);
if(i&&!e.target.closest(‘a’)){e.preventDefault();open(i.currentSrc||i.src)}
});
ov.addEventListener(‘click’,function(e){if(e.target===ov||e.target===btn)close()});
document.addEventListener(‘keydown’,function(e){if(e.key===’Escape’)close()});
})();