📋 Essential to remember: Personally, I consider tile painting, waterproof resin coating, and overlaying PVC panels to be the top non-destructive renovation techniques, saving up to 60% compared to full demolition costs. Thorough surface degreasing with acetone and applying a specialized bonding primer are crucial for preventing future peeling. Completing a tile-over-tile bathroom refresh typically takes 2 to 4 days of work.
Renovating a bathroom without removing the tiles: solutions, steps, and limitations
Renovating a bathroom without removing the tiles allows you to modernize the walls or floor while limiting debris, dust, and the duration of the work. This light renovation can involve suitable paint, resin, wall panels, new tiles laid over the old ones, or simply redoing the grout.
However, the method is not universal: the substrate must be stable, dry, and sufficiently sound. This guide explains how to check the existing tiles, choose the right covering, prepare the surfaces, estimate the budget, and identify situations where removal becomes necessary.
In brief
- 🔎 Stable, dry, and well-adhered tiles can often be kept as a base.
- 🛁 Paint and resin are mainly suitable for wall surfaces with little wear; the shower requires a system designed for humidity.
- 🧱 Wall panels or laying new tiles are better suited for areas exposed to splashes.
- ⚠️ A leak, detached tiles, a damp substrate, or faulty waterproofing require a diagnosis before any covering.
Is it possible to renovate a bathroom without removing the tiles?
🔍 My experience: In November 2024, I renovated a small 5-square-meter rental bathroom using specialized epoxy tile paint for 180 euros. I skipped deep grout cleaning with sugar soap, resulting in paint peeling near the shower area 4 months later. The lesson I learned is that meticulous degreasing and sanding are mandatory for long-term paint adhesion on glazed ceramic tiles.
Yes, it is possible to renovate a bathroom without removing the tiles when the old covering is properly fixed and the substrate shows no moisture problems. The covering then remains a light aesthetic or functional renovation, not a repair of the structure or waterproofing.
Success depends more on the condition of the substrate and preparation than on the chosen finishing product. A new covering will not fix infiltration, a shifting wall, or hollow-sounding tiles over a large area. Therefore, two projects must be distinguished: refreshing the appearance and restoring a degraded bathroom.
Keeping the tiles is not a goal in itself: it is only an option when the existing substrate can sustainably receive a new covering.
This approach generally reduces the volume of demolition but sometimes adds thickness. This can interfere with door opening, furniture alignment, connecting a drain, or installing a shower screen. A level survey before work avoids unpleasant surprises at finishing time.
To expand your bathroom renovation project, I recommend checking tile cleaning with Saint Marc detergent which ensures perfect surface preparation. Exploring tile laying over existing surfaces guide will also give you great installation insights. Finally, reading smoothing silicone joints techniques guarantees clean, watertight bathroom seals.
In which cases can the old tiles be kept?
The old tiles can be kept if the tiles are bonded to the substrate, the grout is not massively crumbling, and no signs of infiltration are visible. The wall or floor must also be sufficiently flat to receive the chosen solution, especially panels or new tiles.
Conditions to check before starting
Start by inspecting the entire surface, including behind furniture and around water inlets. A tile that moves under finger pressure, a crack crossing several elements, or a persistent musty smell should halt the project until the cause is identified.
- Tap gently on several tiles: an isolated hollow sound may require local repair; a widely hollow area indicates a substrate to be redone.
- Look for stains, bubbles, whitish salts, recurring black grout, and deformations.
- Check flatness with a long ruler, especially before installing panels or tiles on top.
- Verify corners, bathtub-wall joints, the perimeter of the shower tray, and pipe penetrations.
- Measure the possible additional thickness at doors, baseboards, sockets, and sanitary equipment.
Situations that require removal
Removal is generally preferable when tiles are detaching over a large area, when the substrate is damp, or when the waterproofing behind the covering is suspect. It can also become essential if the new installation significantly modifies drainage, slopes, or available dimensions.
Old cracked tiles are not always a deal-breaker: a superficial and localized crack can sometimes be repaired. However, repeated cracking, a deformed partition, or a moving floor indicate a deeper problem. In a shower, covering a leak without treating its origin only makes it harder to locate.
What solutions are there for renovating without removing the tiles?
The choice depends on the area, the level of humidity, the expected durability, and the desired finish. Paint is quick and thin, panels effectively cover an old decor, while tile-on-tile offers a finish close to traditional renovation at the cost of more demanding preparation.
Repainting the wall tiles
Special tile paint is mainly used on walls outside direct splash zones. It can transform outdated tiles without significantly changing the wall thickness, but its performance depends on preparation, the product, and water exposure.
In a shower, choose only a system whose technical data sheet specifies this use. Decorative paint intended for a bathroom does not necessarily guarantee lasting durability under daily splashes. The grout must be compatible with the finish and remain properly protected.
Applying resin or a decorative coating
Resin can create a continuous surface and partially mask the relief of old tiles. However, it requires precise dosing, a perfectly degreased surface, and strict adherence to drying times; corners and joints are the most sensitive areas.
This type of finish is interesting for a decorative wall or a vertical surface that is not heavily used. In a shower, it is necessary to verify the compatibility of the entire system with water, cleaning products, and substrate movements, rather than relying solely on the “bathroom” label.
Installing wall panels
Wall panels often provide the simplest solution to cover old tiles in a shower or around a bathtub. They are available from manufacturers in laminate, composite material, PVC, or other supports designed for humid rooms. Joints, cuts, and peripheral seals must be carefully treated.
Before purchase, check the flatness of the wall, the available height, and compatibility with the plumbing fixtures. A panel that is too flexible placed on an uneven support can move, while a poorly sealed joint becomes an entry point for water.
Installing new tiles over the old ones
Laying tiles over existing tiles is possible on a solid, clean, and sufficiently flat support. You must use a preparation system and an adhesive mortar suitable for overlaying, then follow the manufacturer’s recommendations regarding size, support, and drying time.
This option is suitable when you want to restore the look of a true tiled surface. However, it increases the total thickness, which can complicate connections with doors, sanitary appliances, switches, and finishing profiles.
Renovating only the grout
When the tiles are in good condition, redoing the bathroom tile grout can be enough to significantly improve the overall appearance. However, this intervention does not fix infiltration behind the covering and does not replace a degraded flexible joint around a bathtub or shower tray.
Cement grout and flexible grout are not treated the same way. Remove crumbly parts without unnecessarily damaging the support, dust off, then apply a product suitable for the joint width and its exposure to water.
| Solution | Recommended use | Main advantage | Limitation to consider |
|---|---|---|---|
| Special paint | Walls outside direct splashes | Thin layer and quick change | More demanding durability in the shower |
| Resin | Decorative walls and prepared surfaces | Continuous and contemporary appearance | Application sensitive to defects and joints |
| Wall panels | Shower, bathtub, highly exposed walls | Effective coverage of old decor | Thickness, cuts, and joints must be controlled |
| Tile on tile | Stable and flat walls or floors | Robust and traditional finish | Weight, height, and support preparation |
| Grout renovation | Sound but worn tiles | Limited and economical intervention | Does not address hidden leaks |
How to prepare the tiles before covering them?
Preparation begins with a thorough cleaning and only ends when the substrate is clean, dry, repaired, and compatible with the new covering. This step is essential to eliminate grease, soap residues, limescale, and crumbly parts that would prevent adhesion.
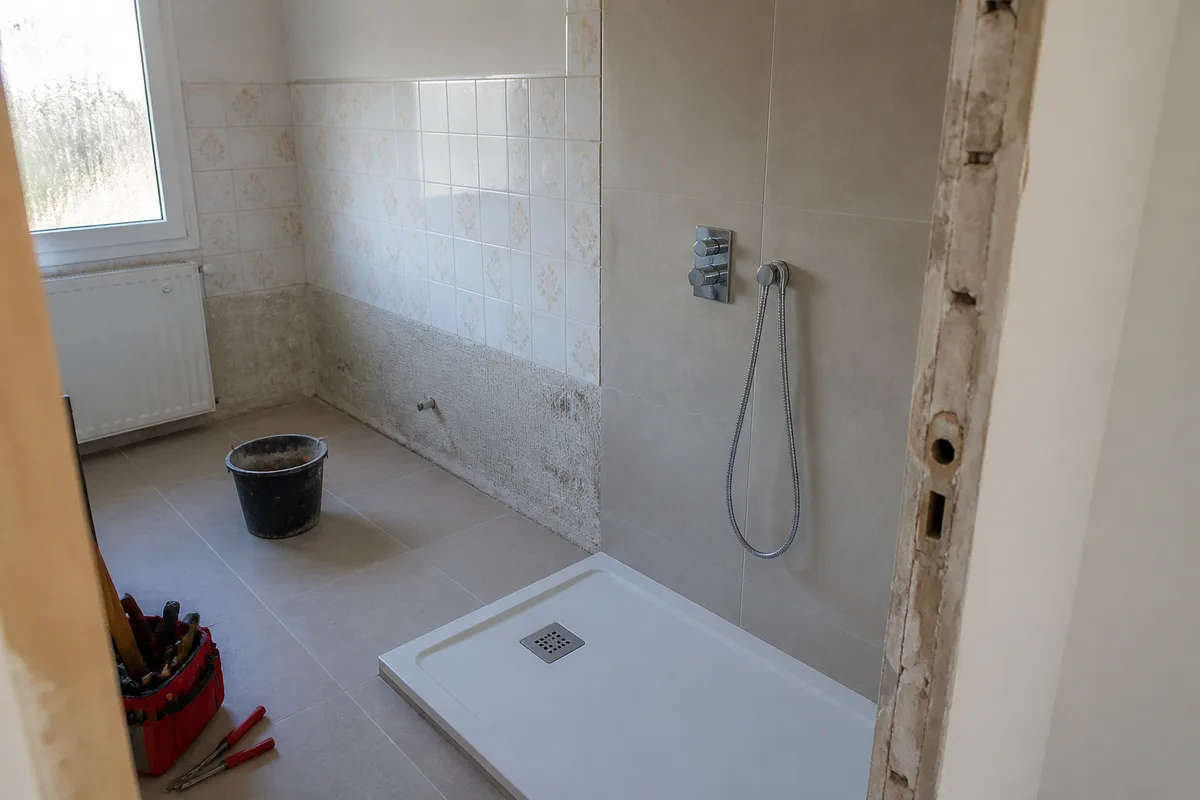
A visually clean substrate is not necessarily ready to be covered: the joints, corners, and areas around sanitary fixtures must also be checked. Work in small areas and allow to dry completely before applying a primer, adhesive, or finish.
Clean and degrease the substrate
Remove soap and limescale deposits with a cleaner compatible with the material, then rinse thoroughly. Greasy products or wax residues can create an invisible film; a final degreasing is therefore often necessary before the adhesion primer.
Avoid mixing household products, especially those containing bleach and acidic products. Ventilate the room, protect equipment, and follow the safety instructions on the packaging.
💡 Did you know: Retaining existing wall tiles adds roughly 8 to 12 mm of thickness when overlaying new ceramic tiles, which may require installing extension kits on plumbing fixtures and door frames.
Repair defects
Loose tiles must be removed or refixed depending on their condition, then hollows must be filled with a compatible product. Crumbly joints should be redone, and old degraded flexible sealants must be removed before applying a new bead.
Do not try to compensate for a major irregularity solely with a thick layer of paint or resin. For a significant defect, a preparatory coating or substrate repair will be more reliable, provided it is compatible with the room’s humidity.
Improve adhesion
Depending on the solution, light sanding, a bonding primer, or a specific preparation may be necessary. The chosen product must correspond to the existing substrate and the final covering; technical data sheets are more reliable than a general rule valid for all systems.
- Inspect the tiles, joints, corners, and sanitary connections.
- Repair or remove unstable elements before any covering.
- Clean, degrease, rinse, then let the substrate dry.
- Protect faucets, drains, preserved floors, and adjacent surfaces.
- Apply the recommended primer or adhesive for the chosen system.
- Install the finish respecting thicknesses, joints, and drying times.
- Redo the peripheral flexible joints before gradually restoring water.
⚠️ Common mistake: Painting directly over silicone sealant joints causes paint to bubble and bead up immediately. Always scrape away old silicone completely and re-apply fresh sealant after painting is finished.
Can the floor and shower be renovated in the same way?
No, the floor, walls outside splash zones, and inside the shower do not undergo the same stresses. The floor receives loads and friction, while the shower is directly exposed to water; a solution suitable for a decorative wall is therefore not automatically suitable for these two areas.
⏱️ Practical tip: Allow tile paint or resin to cure for a full 72 hours before using the shower, ensuring optimal chemical hardening against water exposure.
The bathroom floor
For a stable tiled floor, one can consider new tiles, certain flexible coverings compatible with wet rooms, or a renovation system specifically designed for this use. The substrate must be flat, solid, and free of moisture rising.
A flexible covering can reduce work, but joints, skirting board rises, and areas near a shower must be treated according to the manufacturer’s recommendations. To explore this option further, consult our guide on installing a linoleum floor, always checking the product’s compatibility with a bathroom.
Walls outside splash zones
These are the surfaces that offer the most freedom. Paint, resin, decorative coating, or new covering can be suitable if the wall is stable and properly prepared. The choice can then favor appearance, ease of cleaning, added thickness, and the possibility of touch-ups.
The inside of the shower and the perimeter of the bathtub
These areas require the utmost caution. The joints between walls, shower tray, bathtub, and faucets must remain watertight, and the coating must be specifically designed for repeated exposure to water.
A moisture-resistant finish does not replace faulty waterproofing behind the tiles.
If you modify the shower tray, slope, drainage, or configuration of the shower, the project goes beyond a simple refresh. Installing a walk-in shower, for example, involves issues of slope, drainage, and waterproofing; our article on installing a walk-in shower can serve as a starting point, without replacing technical specifications or the intervention of a professional when the project is complex.
What budget to plan for a renovation without removal?
🍀 Advantages
Fast renovation process without heavy dust or rubble
Significant cost savings compared to total demolition
Wide variety of modern colors and decorative finishes
🔻 Weaknesses
Shorter lifespan than newly installed ceramic tiles
High sensitivity to improper surface cleaning and prep
A renovation without removal generally costs less than a complete demolition, but there is no single price. As a guideline, a simple joint refresh can remain limited to a few hundred euros for supplies, while covering with panels or tiles can reach several thousand euros depending on the surface and equipment.
The budget is mainly determined by the surface area, the condition of the substrate, the number of wet areas, and the labor share. The amounts below are indicative orders of magnitude for 2026, to be confirmed by quotes and the prices actually available at the time of purchase.
| Project | Indicative order of magnitude | What affects the price |
|---|---|---|
| Joint refurbishment | About €10 to €35 per m² installed | Condition of joints, access, removal of old sealant |
| Wall tile painting | About €20 to €60 per m² installed | Primer, number of coats, repairs, paint range |
| Decorative resin | About €50 to €130 per m² installed | Preparation, finish, corners, and level of technicality |
| Wall panels | About €80 to €250 per m² installed | Material, cuts, profiles, faucets, and joints |
| Tiling over old tiles | About €60 to €180 per m² installed | Format, adhesive, leveling or local repair, labor |
The table does not necessarily include plumbing modifications, replacement of a shower tray, ventilation, electricity, or removal of equipment. A quote should specify substrate preparation, products used, protections, finishes, and any waterproofing repairs.
How to limit expenses without weakening the result?
- Keep water inlets and drains when their condition and position suit the project.
- Reserve the most economical decorative solutions for walls outside direct splashes.
- Compare the total cost, including supplies and installation, rather than just the price per square meter.
- Allow a margin for repairs discovered after cleaning or removing equipment.
- Avoid supposedly free or very low-cost renovation offers without a detailed quote, verifiable qualifications, and clear conditions.
Assistance does not automatically finance an aesthetic tile change. In France, some schemes may concern adapting housing to loss of autonomy or work improving energy performance, but their eligibility depends on the household, the housing, the exact nature of the work, and current rules. Check conditions on France Rénov’ and Service-Public.fr before signing a quote.
What mistakes to avoid when you want to keep the tiles?
Failures rarely come from the choice of color. They usually appear when the substrate is poorly diagnosed, water is underestimated, or drying times are shortened to put the room back into service faster.
1. Covering tiles that move
A new coating can temporarily mask the defect, but movements will reappear in the joints or finish. Remove unstable tiles and find the cause before proceeding.
2. Using Ordinary Paint
Standard wall paint is not designed to withstand repeated washing and water splashes in a bathroom. Choose a system clearly compatible with the substrate and the area concerned.
3. Neglecting corners and peripheral joints
The junction between the wall and bathtub, shower tray, or washbasin countertop is particularly exposed. A cracked or poorly adhering flexible joint can allow water to pass behind the new covering.
4. Believing that a covering repairs waterproofing
Paint, resin, or visible panels do not replace a membrane or waterproofing system when required. A persistent moisture stain must be treated before aesthetic renovation.
5. Forgetting the added thickness
A few millimeters can be enough to hinder a door, baseboard, piece of furniture, or drain. Take levels and check connections before purchasing materials.
Should you do the work yourself or call a professional?
A careful individual can often clean, repaint a wall, or redo accessible joints. However, interventions involving electricity, gas, structure, drainage, or shower waterproofing carry greater risks and should be entrusted to a competent person when technical rules exceed common DIY.
The proper scope for DIY is where one masters the substrate, the product, the connections, and the ability to control the result. In a bathroom, where water and electricity are close, caution should prevail over the desire to reduce costs.
| Work | Possible Autonomy | Professional Recommended If… |
|---|---|---|
| Cleaning and Light Preparation | Yes, with appropriate protection and products | The substrate is damp or heavily degraded |
| Wall Painting Outside the Shower | Yes, if preparation is mastered | The coating is peeling or the wall is moving |
| Wall Panels | Possible with precise measurements | Water connections or waterproofing are complex |
| Plumbing Modification | Reserved for experienced persons | A drain, slope, or supply must be moved |
| Electricity in the Bathroom | Do not improvise | An outlet, a circuit, or a safety volume is involved |
Before any electrical intervention, refer to the applicable requirements of standard NF C 15-100 and request a professional inspection if in doubt. For a shower or bathtub, ventilation, safety volumes, and protection against splashes should not be treated as mere finishing details.
How to make renovation more durable and more sustainable?
Bathroom Tile Renovation Cost Estimator
Select a renovation method and wall/floor surface area to estimate material costs.
A light renovation can also improve daily use without replacing all equipment. Durability primarily relies on materials suited to humidity, accessible joints, effective ventilation, and easily repairable elements rather than on a quick decorative effect.
- Choose washable finishes compatible with the cleaning products actually used.
- Plan for replaceable joints and profiles in exposed areas.
- Maintain access to traps, fittings, and shut-off valves.
- Improve ventilation after the shower to limit condensation.
- Reuse furniture or a basin in good condition when it does not compromise waterproofing.
- Gradually replace defective elements rather than redoing the entire room as a principle.
The most economical project is the one that does not mask a defect destined to reappear a few months later.
Useful sources to consult
France Rénov’ presents public schemes related to energy renovation and allows verification of official guidelines. These aids should not be mistaken for automatic funding of purely decorative renovation.
Service-Public.fr gathers general administrative information on works, housing, and certain rules applicable to individuals. Since conditions may change, always check the official page corresponding to your situation.
The NF C 15-100 standard notably regulates electrical installations in homes. For a bathroom, the positioning of equipment and protections must be checked with a qualified electrician or an up-to-date normative source.
Key points to remember
- ✅ Keep the tiles only if they are stable, dry, clean, and sufficiently flat.
- 🧱 Choose paint for walls with low exposure and panels or tile-on-tile for more heavily used areas.
- 💧 Never confuse aesthetic renovation with repairing a leak or faulty waterproofing.
- 📏 Anticipate the added thickness before covering the floor, walls, doors, and sanitary connections.
- 🛠️ Call in a professional for electricity, complex plumbing, structure, or a shower presenting a risk of infiltration.
Frequently asked questions
Can you paint shower tiles without removing them?
It is possible only with a system designed for repeated water exposure and on a perfectly prepared surface. The paint does not repair infiltration or unstable tiles; corners and joints must also be treated.
Can new tiles be laid over old tiles?
Yes, if the old covering is firmly fixed, clean, flat, and compatible with the chosen installation system. You must also check the final thickness, added weight, and connections with doors, furniture, and sanitary appliances.
Should the joints be removed before covering the tiles?
It is not always necessary to remove all joints, but crumbly, greasy, or hollowed parts must be redone. For laying over, significant reliefs and defects may require leveling to prevent the new covering from reproducing irregularities.
How long should you wait before using the bathroom?
The delay depends on the product, temperature, humidity, and number of coats. Respect the water reintroduction delay indicated by the manufacturer, without reducing it because the surface seems dry to the touch.
Is a renovation without removal suitable for an old bathroom?
It can be suitable if the old tiles and substrate are sound. If the room has leaks, rising damp, partition movements, or obsolete electrical installations, a more complete diagnosis and sometimes removal are necessary.
.magic-lb-overlay{position:fixed;inset:0;background:rgba(15,23,42,.92);display:none;align-items:center;justify-content:center;z-index:99999;cursor:zoom-out;padding:20px}
.magic-lb-overlay.open{display:flex}
.magic-lb-overlay img{max-width:95vw;max-height:95vh;object-fit:contain;border-radius:8px;box-shadow:0 8px 32px rgba(0,0,0,.5)}
.magic-lb-close{position:absolute;top:16px;right:20px;color:#fff;background:rgba(0,0,0,.5);border:none;width:40px;height:40px;border-radius:50%;font-size:24px;cursor:pointer;display:flex;align-items:center;justify-content:center}
.magic-lb-close:hover{background:rgba(0,0,0,.8)}
.wp-block-image img{cursor:zoom-in;transition:transform .15s ease}
.wp-block-image img:hover{transform:scale(1.01)}
.magic-img-link{display:inline-block;text-decoration:none}
(function(){
var ov=document.getElementById(‘magic-lb’);if(!ov)return;
var img=ov.querySelector(‘img’),btn=ov.querySelector(‘.magic-lb-close’);
function open(src){img.src=src;ov.classList.add(‘open’);document.body.style.overflow=’hidden’}
function close(){ov.classList.remove(‘open’);img.src=”;document.body.style.overflow=”}
document.addEventListener(‘click’,function(e){
var a=e.target.closest(‘a.magic-img-link’);
if(a){e.preventDefault();open(a.getAttribute(‘href’));return}
var i=e.target.closest(‘.wp-block-image img’);
if(i&&!e.target.closest(‘a’)){e.preventDefault();open(i.currentSrc||i.src)}
});
ov.addEventListener(‘click’,function(e){if(e.target===ov||e.target===btn)close()});
document.addEventListener(‘keydown’,function(e){if(e.key===’Escape’)close()});
})();